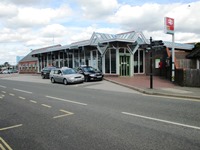
Access Guide
Terminus Road North
- Leave the station and turn left onto Terminus Road.
- The pavement is level and has a tarmac surface.
Junction Terminus Road - Albert Road
- Continue forward on Terminus Road across the junction with Albert Road.
- The junction has dropped kerbs but no tactile markings.
- The surface is tarmac.
Terminus Road Crossing
- Cross the road at the pelican crossing to the south side of Terminus Road at Antonia Court.
- The pavement has an easy slope to the roadside where there are dropped kerbs and tactile markings either side of the road.
Terminus Road South
- Here there is a tarmac pavement with an easy camber from the inside towards the kerb.
- There are obstacles along the pavement.
- The clear width between the obstacle and the wall is 138cm.
High Street
- Continue forward where the road changes to High Street and a block paved surface.
- There are entrances that you must cross, which have dropped kerbs.
Junction High Street - Laneway
- Cross over a laneway leading behind the shops.
- The laneway has dropped kerbs but no tactile markings.
- The lane surface is block paved and uneven in places.
Junction High Street - Surrey Street
- Here the High Street carries straight on as a pedestrian precinct.
- Bear right into Surrey Street where there is a taxi rank on your left.
Surrey Street
- The pavement is block paved and has an easy slope from High Street towards Viking Terrace.
Junction Surrey Street - Viking Terrace
- At the bottom of Surrey Street bear right and cross over the road to Viking Terrace.
- There is a slope down and then up from the Surrey Street pavement.
- There is a slope with tactile markings up to Viking Terrace.
Viking Terrace
- Viking Terrace is level and has a paved stone surface.
- River Road car park is on the right.
- Blue Badge parking is free.
Junction Viking Terrace - White Court
- Cross the road and turn left at the junction of White Court.
- The junction has dropped kerbs to both sides but only tactile marking on the far side.
- The surface is paving stone.
Surrey Street - Riverside Walk
- Here the surface changes to block paving.
- At this point there is an uneven moderate slope down and then up as you continue to Riverside Walk.
- On the right here is the Harbour Lights Centre and cafe/restaurant with an accessible toilet available.
Riverside Walk
- As you approach Riverside Walk there are bollards across the pavement.
- The clear width between the bollards is 120cm.
- Riverside Walk is a level block paved walk along the rivers edge.
Junction Riverside Walk - Pier Road
- At the end of Riverside Walk turn right into Pier Road.
- There are bollards on your left with a clear width of 90cm.
- There is a slight slope on to Pier Road.
- The pavement surface switches from block paving to concrete slabs.
- There are 4 steps on the left of the walkway with tactile paving at the top and bottom.
Pier Road
- Continue on Pier Road where the surface is concrete slabs.
Arun Parade / River Edge
- Continue forward into Arun Parade.
- Here there is a choice of following the tarmac pavement or the block paved river edge.
- There is bench seating available on both routes (photograph 2).
- There is a fun fair on the left (photograph 3).
- If you followed the road route, there is a slight ramp with handrails on both sides at the end of the road to head back towards the promenade (photograph 5).
- At the end of Arun Parade there are bollards with a clear width of 130cm (photograph 6).
Pier / Promenade
- You have arrived at the pier.
- At the entrance to the pier there are two bollards with a clear width of 110cm. There are benches along the length of the pier.

