
Access Guide
Getting To The Hospital
-
By Road
View
- Exit the A14 at Junction 7 and follow the signs for the Town Centre.
Carry on past the Crematorium on the left.
At the roundabout either take the right exit for Car Parks A and B, or go straight ahead on Rothwell Road past the main hospital site.
Before the bridge use Car Park D for Entrance 4 and the Treatment Centre. The post code to use for a Sat-Nav is NN16 8UZ. - There are several car parks across the Hospital site but the 3 main ones are Car Parks A and B which service the main building and the Outpatients Departments and Car Park D which services the Treatment Centre.
Car parks A and D are open-air and Car Park B is 2-tiered with limited accessible parking.
- Exit the A14 at Junction 7 and follow the signs for the Town Centre.
-
By Bus
View
- There are several bus routes which stop outside the hospital, they are: the X1 Corby, which provides a regular service from the Town Centre (Stagecoach), the number 19 Rothwell and Desborough (Stagecoach), the number 10 West Hunsbury, Northampton, Moulton, Holcot, Old, Mawsley and Broughton (Stagecoach), the X10 Market Harborough/Northampton (Stagecoach) and the number 34 Wellingborough (Centrebus).
-
By Train
View
- The nearest train station is Kettering, it is approximately 0.5 miles from the Hospital which is a short 10 minute walk.
There are several Taxi Services which run from the train station.
- The nearest train station is Kettering, it is approximately 0.5 miles from the Hospital which is a short 10 minute walk.
-
Useful Links
View
- Please see the link below for information on east midland trains.
- To view the web page described above click here (opens in new tab).
- Please see the link below for information about Stagecoach bus services.
- To view the web page described above click here (opens in new tab).
- Please see the link below for information about Northamptonshire Travel.
- To view the web page described above click here (opens in new tab).
- Please see the link below for the route from Kettering train station to the Hospital.
- To view the web page described above click here (opens in new tab).
Getting Help and Assistance
- There is a Patient Advice and Liaison Service (PALS) at the hospital.
- The Patient Advice and Liaison Service (PALS) is located on the ground floor of the main hospital building in the corridor to the right of the main hospital reception.
- The telephone number for the Patient Advice and Liaison Service (PALS) is 01536 493 305.
- The email address for the Patient Advice and Liaison Service (PALS) is [email protected].
- There are volunteers available for help and assistance at the hospital.
- Volunteers can be found at the main entrance and throughout the main hospital building corridors.
- There is an assistance dog toilet or toileting area on the hospital site.
- The assistance dog toilet or toileting area is located on the green areas around the hospital site.
- Water bowls for assistance dogs are available.
- BSL interpreters can be provided on request.
- Language interpreters can be provided on request.
- A mobility scooter charging point is not available at the hospital.
- Mobility aids are available to help patients move around and include; wheelchairs, mobile hoists and adjustable beds.
- To obtain mobility aids please contact a member of staff.
Hospital Parking (Area A Parking)
-
Parking
View
- The hospital does have a dedicated car park.
- The car park is located at the front of the building, off Rothwell Road.
- The car park type is open air/surface.
- The car park does not have a height restriction barrier.
- The car park does not have a barrier control system.
- The car park surface is tarmac.
- There is a/are Blue Badge parking bay(s) available.
- The Blue Badge bay(s) is/are clearly marked.
- There is/are 5 designated Blue Badge parking bay(s) within the hospital car park.
- The dimensions of the designated Blue Badge parking bay(s) surveyed are 240cm x 500cm (7ft 10in x 16ft 5in).
- There is not a 120cm hatched zone around the Blue Badge parking bay(s).
- Parking spaces for Blue Badge holders do not need to be booked in advance.
-
Drop-off Point
View
- There is a designated drop-off point.
- The drop-off point is located in front of the Area A entrance.
- There is not a dropped kerb from the drop-off point.
-
Paying
View
- There are parking charges for the hospital car park.
- Payment signs are provided.
- Payment signs are clearly presented.
- Payment signs are located at the payment machines in the car park and throughout the car park.
- Payment signs do make it clear if parking charges apply to Blue Badge holders.
- Parking is free for Blue Badge holders.
- Payment machines are located throughout the car park.
- There is not a payment machine at a convenient height for wheelchair users.
- To see the hospital parking charges please click here (opens new tab).
-
Access to the Hospital
View
- The route from the car park to the entrance is accessible to a wheelchair user with assistance.
- Assistance may be required because there is/are slopes/ramps.
- The hospital entrance is clearly visible from the car park.
- The nearest designated Blue Badge parking bay is approximately 22m (24yd 2in) from the Area A entrance.
-
Comments
View
- The controls of the payment machine are between 86cm and 117cm high.
Outside Access (Area A Entrance)
-
Entrance Details
View
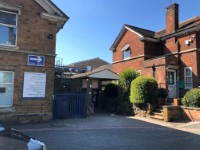
- This information is for the entrance located at the front of the building, facing the Area A car park off Rothwell Road.
- The entrance area/door is clearly signed.
- There is ramped/sloped access at this entrance.
- There is a canopy or recess which provides weather protection at this entrance.
- The entrance door(s) does not/do not contrast visually with its immediate surroundings.
- There is a dark mat or floor marking at this entrance that might be perceived as a hole.
- There is a hand sanitiser.
- The height of the hand sanitiser is 142cm (4ft 8in).
- There is not a door release button when exiting.
- The main door(s) open(s) automatically.
- The door(s) is/are double width.
- The width of the door opening is 110cm.
- There is a second set of doors.
- The door(s) open(s) automatically.
- The door(s) is/are double width.
- The width of the door opening is 117cm.
-
Ramp/Slope Details
View
- The ramp/slope is located leading to the Area A entrance.
- The ramp/slope gradient is slight.
Outside Access (Area A First Floor Entrance)
-
Entrance Details
View
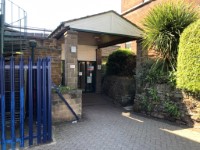
- This information is for the entrance located on the pathway leading from the Centenary Wing.
- The entrance area/door is clearly signed.
- There is ramped/sloped access at this entrance.
- There is a canopy or recess which provides weather protection at this entrance.
- The entrance door(s) does/do contrast visually with its immediate surroundings.
- There is a dark mat or floor marking at this entrance that might be perceived as a hole.
- There is a hand sanitiser.
- The height of the hand sanitiser is 141cm (4ft 8in).
- There is a door release button when exiting.
- The height of the door release button is 118cm (3ft 10in).
- The main door(s) open(s) towards you (pull).
- The door(s) is/are double width.
- The door(s) may be difficult to open.
- The width of the door opening is 128cm.
- There is a small lip on the threshold of the entrance, with a height of 1.5cm or below.
-
Ramp/Slope Details
View
- The ramp/slope is located leading to the Area A first floor entrance.
- The ramp/slope gradient is slight.
Getting Around (Area A)
-
Access
View
- There is step free access throughout the building via lift(s).
- There is a slight slope, with handrails on both sides, for access to the Lamport, Twywell and Naseby wards on the first floor.
- There is/are 10+ clearly marked step(s), with handrails on both sides, for access to the Naseby ward on the first floor.
- The height of the step(s) is/are between the recommended 15cm and 18cm.
- The depth of the step(s) is/are between the recommended 30cm and 45cm.
- There is a standard lift which overcomes the steps.
- The slope is shown in photograph 1 and the steps are shown in photograph 2.
-
Circulation
View
- There are doors in corridors which have to be opened manually.
- The type of flooring in walkways and corridors is vinyl.
- There is some flooring in corridors which includes patterns or colours which could be confusing or look like steps or holes to some people.
- There is some flooring in corridors which is shiny and could cause issues with glare or look slippery to some people.
- Handrails are provided in some corridors.
- Seating is provided in some corridors.
- There is good colour contrast between the walls and floor in the majority of corridors.
- The lighting levels are varied.
-
Signage and Wayfinding
View
- Wayfinding signage is provided.
- The colour, design and typeface of signs is consistent throughout the building.
- The wayfinding signage does not include pictograms.
- Dementia friendly signage is not provided.
- Maps are provided at key intersections.
-
Safe Place(s)
View
- There is not a designated place of safety which can be used by people with dementia, autism or learning disabilities.
-
Audio
View
- This venue does not play background music in public areas.
- There is not a hearing assistance system in the public areas of the building.
Lift (Right Side Lift)
- There is a lift for public use.
- The lift is located to the right on entering the Area A entrance.
- Signs indicating the location of this lift are not clearly visible from the entrance.
- The lift is approximately 10m (10yd 2ft) from the Area A entrance.
- The lift is a standard lift.
- Staff do not need to be notified for use of the lift.
- The floors which are accessible by this lift are G and 1.
- Clear signs indicating the facilities on each floor are not provided on lift lobby landings.
- There is a clear level manoeuvring space of 150cm × 150cm in front of the lift.
- Lift doors do contrast visually with lift lobby walls.
- The external controls for the lift are not within 90cm - 110cm from the floor.
- The controls on the ground floor are set at 122cm from the floor and the controls on the first floor are 104cm from the floor.
- The colour contrast between the external lift controls and the control plate is fair.
- The colour contrast between the external lift control plate and the wall is good.
- The clear door width is 130cm (4ft 3in).
- The dimensions of the lift are 160cm x 278cm (5ft 3in x 9ft 1in).
- There are separate entry and exit doors in the lift.
- There is not a list of floor services available within the lift.
- The lift does have a visual floor indicator.
- The lift does have an audible announcer.
- The internal controls for the lift are within 90cm - 120cm from the floor.
- There is a hearing assistance system.
- The lift does not have Braille markings.
- The lift does have tactile markings.
- The lighting level in the lift is good.
Lift (Left Side Lift)
- There is a lift for public use.
- The lift is located at the end of the corridor to the left as you enter via the Area A entrance.
- Signs indicating the location of this lift are not clearly visible from the entrance.
- The lift is approximately 95m (103yd 2ft) from the Area A entrance.
- The lift is a standard lift.
- Staff do not need to be notified for use of the lift.
- The floors which are accessible by this lift are LG, G and 1.
- Clear signs indicating the facilities on each floor are not provided on lift lobby landings.
- There is a clear level manoeuvring space of 150cm × 150cm in front of the lift.
- Lift doors do contrast visually with lift lobby walls.
- The external controls for the lift are within 90cm - 110cm from the floor.
- The colour contrast between the external lift controls and the control plate is fair.
- The colour contrast between the external lift control plate and the wall is good.
- The clear door width is 130cm (4ft 3in).
- The dimensions of the lift are 154cm x 237cm (5ft 1in x 7ft 9in).
- There are not separate entry and exit doors in the lift.
- There is a mirror to aid reversing out of the lift.
- There is a list of floor services available within the lift.
- The lift does have a visual floor indicator.
- The lift does have an audible announcer.
- The internal controls for the lift are not within 90cm - 120cm from the floor.
- The internal lift controls are between 85cm and 97cm high.
- There is not a hearing assistance system.
- The lift does not have Braille markings.
- The lift does have tactile markings.
- The lighting level in the lift is good.
Lift (First Floor - Stepped Level Change Lift)
- There is a lift for public use.
- The lift is located towards the end of the corridor to the left as you enter via the Area A first floor entrance.
- Signs indicating the location of this lift are not clearly visible from the entrance.
- The lift is approximately 55m (60yd 5in) from the Area A first floor entrance.
- The lift is a standard lift.
- Staff do not need to be notified for use of the lift.
- The platform lift accesses a small level change.
- Clear signs indicating the facilities on each floor are provided on lift lobby landings.
- There is a clear level manoeuvring space of 150cm × 150cm in front of the lift.
- Lift doors do contrast visually with lift lobby walls.
- The external controls for the lift are within 90cm - 110cm from the floor.
- The colour contrast between the external lift controls and the control plate is fair.
- The colour contrast between the external lift control plate and the wall is poor.
- The clear door width is 140cm (4ft 7in).
- The dimensions of the lift are 168cm x 275cm (5ft 6in x 9ft).
- There are separate entry and exit doors in the lift.
- There is not a list of floor services available within the lift.
- The lift does have a visual floor indicator.
- The lift does have an audible announcer.
- The internal controls for the lift are within 90cm - 120cm from the floor.
- There is not a hearing assistance system.
- The lift does not have Braille markings.
- The lift does have tactile markings.
- The lighting level in the lift is moderate to good.
Other Floors (Right Side Stairs)
-
Stairs
View
- Signs indicating the location of the stairs are not clearly visible from the entrance.
- The floors which are accessible by stairs are G and 1.
- There are 14 steps between floors.
- The height of the step(s) is/are between the recommended 15cm and 18cm.
- The depth of the step(s) is/are not between the recommended 30cm and 45cm.
- The steps are clearly marked.
- The steps do have handrails.
- The steps have a handrail on both sides.
- Handrails are at the recommended height (90cm-100cm).
- Handrails do cover the flight of stairs throughout its length.
- Handrails are easy to grip.
- Handrails do not extend horizontally beyond the first and last steps.
- There is a landing.
- Clear signs indicating the facilities on each floor of the building are provided on landings.
- The lighting levels are good.
-
Comments
View
- There is signage on the ground floor as you approach the stairs however there is no signage on the first floor when coming down the stairs.
Other Floors (Central Stairs)
-
Stairs
View
- Signs indicating the location of the stairs are not clearly visible from the entrance.
- There are manual, single doors which are easy to open to enter and exit the stairwell from the first floor upwards.
- The floors which are accessible by stairs are G, 1 and 2.
- There are 15+ steps between floors.
- The height of the step(s) is/are between the recommended 15cm and 18cm.
- The depth of the step(s) is/are not between the recommended 30cm and 45cm.
- The steps are clearly marked.
- The steps do have handrails.
- The steps have a handrail on the right going up.
- Handrails are not at the recommended height (90cm-100cm).
- Handrails do cover the flight of stairs throughout its length.
- Handrails are easy to grip.
- Handrails do extend horizontally beyond the first and last steps.
- There is a landing.
- Clear signs indicating the facilities on each floor of the building are not provided on landings.
- The lighting levels are moderate to good.
Other Floors (Left Side Stairs)
-
Stairs
View
- Signs indicating the location of the stairs are not clearly visible from the entrance.
- There are manual, double doors which may be difficult to open to enter and exit the stairwell on the lower ground floor and on the first floor.
- The floors which are accessible by stairs are LG, G and 1.
- There are 15+ steps between floors.
- The height of the step(s) is/are between the recommended 15cm and 18cm.
- The depth of the step(s) is/are between the recommended 30cm and 45cm.
- The steps are clearly marked.
- The steps do have handrails.
- The steps have a handrail on both sides.
- Handrails are not at the recommended height (90cm-100cm).
- Handrails do cover the flight of stairs throughout its length.
- Handrails are easy to grip.
- Handrails do not extend horizontally beyond the first and last steps.
- There is a landing.
- Clear signs indicating the facilities on each floor of the building are provided on landings.
- The lighting levels are good.
Accessible Toilet(s) (Ground Floor - Left Hand Transfer)
- There is an/are accessible toilet(s) available.
-
Location and Access
View
- This accessible toilet is located towards the end of the corridor to the left as you enter via the Area A entrance.
- This accessible toilet is approximately 85m from the Area A entrance.
- There is step-free access into the accessible toilet.
- This is a shared toilet.
- A key is required for the accessible toilet.
- The key is a radar key.
- The key can be obtained from main reception.
- There is pictorial and written text signage on or near the toilet door.
- The contrast between the external door and wall is good.
- The door opens outwards.
- The door may be difficult to open.
- The door is locked by a locking handle.
- The width of the accessible toilet opening is 78cm (2ft 7in).
- The contrast between the internal door and wall is good.
- The door has a horizontal grab rail.
- The contrast between the horizontal grab rail and internal door is fair.
-
Toilet Features
View
- The dimensions of the accessible toilet are 259cm x 291cm (8ft 6in x 9ft 7in).
- The accessible toilet does have an unobstructed minimum turning space of 150cm x 150cm.
- The lighting levels are good.
- There is a lateral transfer space.
- As you face the toilet pan the transfer space is on the left.
- The lateral transfer space is 182cm.
- There is a flush, however it is not on the transfer side.
- There is a spatula type lever flush.
- There is a dropdown rail on the transfer side.
- The contrast between the dropdown rail(s) and wall is good.
- There is a/are wall-mounted grab rail(s) available.
- As you face the toilet the wall-mounted grab rail(s) is/are on both sides.
- There is a vertical wall-mounted grab rail on the transfer side.
- There is a horizontal wall-mounted grab rail on the opposite side of the seat to the transfer space.
- The contrast between the wall-mounted grab rail(s) and wall is good.
- The contrast between the walls and floor is good.
- There is an emergency alarm.
- The emergency alarm was out of reach (higher than 10cm (4") from floor) when surveyed.
- There is a red flashing fire alarm beacon within the toilet.
- Disposal facilities are available in the toilet.
- There is a/are pedal bin and clinical waste disposal units.
- There is a/are coat hook(s).
- There are coat hooks in the toilet at 138cm and 148cm from the floor.
-
Additional Fixtures
View
- There is a mirror.
- The mirror is not placed at a lower level or at an angle for ease of use.
- There is not a shelf within the accessible toilet.
- The toilet has a cistern.
- There is a lid attached to the toilet seat.
- The height of the toilet seat above floor level is 49cm (1ft 7in).
- The toilet seat colour contrast is good.
- There is a toilet roll holder.
- The toilet roll holder can be reached from seated on the toilet.
- The toilet roll holder is not placed higher than 100cm (3ft 3in).
- The height of the toilet roll holder is 95cm (3ft 1in).
- The contrast between the toilet roll holder and the wall is fair.
- There is a wash basin.
- The wash basin and tap(s) can be reached from seated on the toilet.
- The wash basin is not placed higher than 74cm (2ft 5in).
- The height of the wash basin is 67cm (2ft 2in).
- There are vertical wall-mounted grab rails on both sides of the wash basin.
- The contrast between the wash basin wall-mounted grab rail(s) and wall is good.
- The wash basin tap type is lever mixer.
- There is a wall fixed soap dispenser.
- The soap dispenser can be reached from seated on the toilet.
- The height of the soap dispenser is 115cm.
- There is a towel dispenser.
- The towel dispenser cannot be reached from seated on the toilet.
- The towel dispenser is placed higher than 100cm (3ft 3in).
- The height of the towel dispenser is 120cm (3ft 11in).
- The contrast between the towel dispenser and the wall is fair.
- There is not a hand dryer.
-
Baby Changing Facilities
View
- Baby changing facilities are located within the accessible toilet.
- There is a flip down baby change table available.
- The height of the baby change table is 93cm.
Standard Toilet(s) (Area A Toilets)
- Standard toilet facilities are available.
-
Toilet Facilities
View
- The female and male toilets are located along the corridor to the left as you enter via the Area A entrance.
- There is step-free access into the toilet(s).
- The standard toilet(s) is/are approximately 45m from the Area A entrance.
- There is pictorial and written text signage on or near the toilet door.
- The colour contrast between the external toilet door(s) and wall(s) is good.
- The colour contrast between the internal toilet door(s) and wall(s) is good.
- The colour contrast between the walls and floor is good.
- The toilet seats have a good colour contrast.
- An ambulant toilet cubicle is not available.
- The height of the wash basin(s) is 81cm.
- The wash basin(s) tap type is push.
- There is a wall fixed soap dispenser.
- The wall fixed soap dispenser is located above the wash basin.
- Lighting levels are good.
-
Baby Changing Facilities
View
- Baby change facilities are available in the female toilets.
- There is a flip down baby change table available.
- The height of the baby change table is 94cm.
Related Access Guides
- To view other Detailed Access Guides that are related to this one please use the links below.
- Main Entrance - Main Building/Cardiac Centre and Foundation Wing link (new tab) - click here.