

Access Guide
Introduction
- The following information describes the route from Coach Lane Main Reception to the Sutherland Building on City Campus.
- The approximate distance of this route is 5.6km.
- The route takes approximately 30 minutes.
- The route leads from the Coach Lane Campus onto Coach Lane, Front Street and Benton Road.
- The route then uses public transport to Haymarket.
- The route then leads through Northumberland Street and onto Northumberland Road to the Sutherland Building.
- The majority of paths along the route are tarmac with some easy and moderate gradients in places.
- Northumberland Street is pedestrianised with a block paving surface.
- There is not street signage located along the route directing you to the City Campus.
- Once on the City Campus there is street signage located along the route directing you to the Sutherland Building.
- There is campus parking on the Coach Lane and City campuses.
- The potential hazards on this route include; busy roads and crossing points.
- The visual indicators at the crossing points are activated by push buttons. These are between the heights of 95cm and 115cm.
Coach Lane Main Reception
- There is ramped access to the Coach Lane Main Reception.
- Accessible toilets are available throughout the Coach Lane campus.
- There is step free access throughout the majority of the Coach Lane Campus.
- Car parking facilities are available at Coach Lane Campus West.
- For more information about C Block Coach Lane please click here (opens in new tab).
Coach Lane Main Reception to Front Street
- This section of the route is approximately 690m.
- After leaving the main entrance follow the path ahead.
- There is an easy ramp going down here.
- To the right of the main entrance there is seating available.
- The path follows the wall to the left as you exit the building.
- After approximately 30m you will come to a fork in the path (photograph 7).
- Follow the path to the left and continue ahead.
- There is an easy slope here, going up, without handrails.
- Turn left and follow the Coach Lane (photograph 11).
- After approximately 25m cross the exit road from the Coach Lane Campus West Car Park (photograph 13).
- There is not a designated crossing point.
- There is not a dropped kerb.
- There are no crossing markings.
- Caution is advised when crossing the road because of traffic exiting the Coach Lane Campus.
- The traffic is moving from the left only.
- Continue along Coach Lane for approximately 35m.
- Cross over Fairburn Avenue (photograph 14).
- There is not a designated crossing point.
- There is not a dropped kerb.
- There are no crossing markings.
- Traffic comes from both directions.
- After crossing Fairburn Avenue there are bollards (photograph 15).
- The width between the bollards is over 150cm.
- The pavement becomes a mixture of tarmac and paving slabs.
- There are some uneven surfaces on this section of the route.
- Continue along Coach Lane.
- The footpath becomes tarmac, with a rain gulley to the right (photograph 17).
- Cars may be parked to the right of the gulley.
- After approximately 120m continue past a pedestrian crossing (photograph 18).
- There is tactile paving at the pedestrian crossing (photograph 19).
- There is additional tactile paving after approximately 18m (photograph 20).
- Continue along Coach Lane for approximately 72m.
- Cross over Rosemount Way (photographs 22 and 23).
- There is not a designated crossing point.
- There is not a dropped kerb.
- There are no crossing markings.
- Traffic comes from both directions.
- The footpath veers slightly to the left, with a grass verge to the right (photograph 24).
- The footpath narrows to 98cm.
- There are trees along the left hand side of the footpath.
- The roots of the trees have raised the footpath in some areas causing potential trip hazards (photograph 25).
- Continue along Coach Lane for approximately 142m.
- Cross over Portrush Way (photographs 26 and 27).
- There is not a designated crossing point.
- There is not a dropped kerb.
- There are no crossing markings.
- Traffic comes from both directions.
- Continue along Coach Lane for approximately 127m.
- Cross over Hoylake Avenue (photographs 29 and 30).
- There is not a designated crossing point.
- There is a dropped kerb.
- There is not tactile paving at the dropped kerb.
- There are no crossing markings.
- Traffic comes from both directions.
- Continue along Coach Lane for approximately 37m.
- Cross over the access road to residential parking (photographs 31 and 32).
- There is not a designated crossing point.
- There is a dropped kerb.
- There is not tactile paving at the dropped kerb.
- There are no crossing markings.
- Traffic comes from both directions.
- Continue along Coach Lane for approximately 53m until you reach Front Street.
- At the end of Coach Lane turn left onto Front Street.
Front Street to Four Lane Ends Interchange
- This section of the route is approximately 380m.
- After turning onto Front Street proceed along the pathway.
- The pavement becomes concrete tiles.
- There is an easy uphill gradient along this section of the route.
- There are some driveways to buildings on Front Street which must be crossed (shown in photographs 2, 3, and 6).
- There are dropped kerbs at the crossings.
- There are not tactile markings at the crossings.
- After approximately 129m there is a Pedestrian crossing (shown in photographs 8 and 9).
- The crossing has dropped kerbs with tactile paving on both sides of the road.
- The height to the button on the crossing is 94cm.
- The crossing has both audible and visual indicators.
- Traffic comes from both directions.
- The road can be busy.
- After crossing the road turn left.
- Continue along Front Street.
- There are driveways to cross with dropped kerbs (shown in photographs 9 and 11).
- There are not tactile markings at the dropped kerbs.
- There are doorsteps from the houses along this section of the route which protrude onto the footpath causing potential trip hazards (shown in photograph 10).
- Continue along Front Street for approximately 165m, to the junction with Benton Road.
- At the junction turn right onto Benton Road (photograph 12).
- Four Lane Ends Interchange is on the right after approximately 26m.
- The surface of the footpath on Benton Road is block paved and cobblestones (shown in photograph 13).
- There is a designated crossing point to access the Interchange.
- The crossing point is marked in black and white tarmac.
- There is a dropped kerb at the crossing point.
- There are tactile markings at the dropped kerbs.
- On reaching Four Lane Ends Interchange take the Yellow Line towards South Shields, to Haymarket.
- The Metro journey takes approximately 11 minutes and lasts for 6 stops.
Haymarket to Sutherland Building
- After exiting Haymarket Metro Station turn right onto Northumberland Street.
- Follow Northumberland Street for approximately 92m.
- This section of the route is block paved and pedestrianised.
- There are bollards along this section of the route.
- The width between the bollards is 95cm.
- Turn left at Santander and Primark onto Northumberland Road.
- There are bollards as you exit the pedestrianised area.
- The width between the bollards is 114cm.
- Continue along Northumberland Road.
- The pathway becomes concrete tiles.
- After approximately 125m you will come to a pedestrian crossing.
- There are dropped kerbs with tactile paving at this crossing point.
- The traffic is moving from both directions.
- The surface of the crossing point is concrete tiles.
- The crossing point is controlled by a visual indicator.
- The visual indicators are activated by push buttons.
- There is step free access throughout this part of the route.
- The surface of the path along John Dobson Street is paving slabs.
- Immediately after the crossing point there is an additional crossing point.
- This crossing point is a zebra crossing.
- There are dropped kerbs with tactile paving at this crossing point.
- The surface of the crossing point is block paved.
- The crossing point is marked in white and black paving.
- The crossing point crosses a cycle lane.
- Caution is advised when crossing because of cycle traffic.
- The traffic is moving from both directions.
- Follow Northumberland Road for approximately 62m.
- The surface of the path along Northumberland Road is paving slabs.
- After approximately 62m Northumberland Road crosses College Street.
- There are dropped kerbs with tactile paving at this crossing point.
- There are no pedestrian crossing signals at this crossing point.
- Caution is advised when crossing because of traffic.
- The traffic is moving from both directions.
- Continue along Northumberland Road for approximately 54m.
- This part of the route is pedestrianised.
- The surface of the route is block paved.
- There are some tactile markings along the route which designate the boundaries of the adjacent buildings.
- There is seating along this part of the route.
- After approximately 54m turn right and cross over Northumberland Road.
- Enter Sutherland Building via ramp at the left hand side of the building, leading to the accessible entrance.
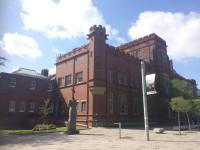
Sutherland Building
- There is ramped access to the Sutherland Building.
- Accessible toilets are available throughout the Sutherland Building.
- There is step free access throughout the majority of the Sutherland Building.
- Car parking facilities are available at the rear of the Sutherland Building.
- For more information about Sutherland Building please click here (opens in new tab).