

Access Guide
Summary - Alighting/Transferring (the Victoria and Bakerloo Lines (Southbound))
-
Exit Route Summary
View
- This Access Guide details the peak route from the Victoria and Bakerloo line southbound platforms to the ticket hall.
- Route 1 sections in this Access Guide describe the journey from the Victoria and Bakerloo lines (southbound) to the station exits.
The route uses escalators and is approximately 100 metres (excluding the escalators) to the closest exit.
There are escalators between the Victoria and Bakerloo line southbound platforms concourse and the intermediate concourse.
There is then a second set of escalators between the intermediate concourse and the ticket hall.
From the ticket hall, there are then 8 exits from the station up to street level, all of which have stepped access. - This access guide also details the transfer routes to the Victoria and Bakerloo line northbound platforms, the Central line platforms, and the links between the Victoria and Bakerloo line southbound platforms.
Victoria line southbound platform 5 has a link passage to Central line platforms 1 and 2.
This is described in the route 4 section below.
Bakerloo line southbound platform 3 has a link passage to Central line platforms 1 and 2.
This is described in the route 5 section below.
Victoria line southbound platform 5 has a link passage to Bakerloo line northbound platform 4.
This is described in the route 6 section below.
Victoria line southbound platform 5 has a link passage to Bakerloo line southbound platform 3.
This is described in the route 7 section below.
Bakerloo southbound platform 3 has a link passage to Victoria line northbound platform 6.
This is described in the route 8 section below.
Bakerloo line southbound platform 3 has a link passage to Victoria line southbound platform 5.
This is described in the route 9 section below. - All the link passages mentioned above involve steps, with the exception of the links between the southbound Bakerloo and Victoria line platforms (routes 7 and 9).
-
Distance(s) for Exiting and Transferring
View
- The shortest distance (via escalators) to Exit 1 - Oxford Street east/Regent Street north from the Victoria and Bakerloo line platforms (southbound is approximately 100m.
- The shortest distance (via escalators) to Exit 2 - Oxford Street east/Regent Street south from the Victoria and Bakerloo line platforms (southbound) is approximately 100m.
- The shortest distance (via escalators) to Exit 3 - Oxford Street west/Regent Street south from the Victoria and Bakerloo line platforms (southbound) is approximately 100m.
- The shortest distance (via escalators) to Exit 4 - Oxford Street west/Regent Street north from the Victoria and Bakerloo line platforms (southbound) is approximately 100m.
Platform(s) (Route 1 - Exiting the Station - Alight the Train onto Platform 5 (Southbound))
-
Platform Information
View
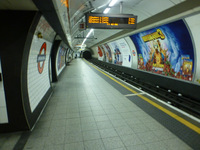
- This is a straight platform.
- There is a slope to and from a raised section in the centre of the platform.
- There are tactile markings along the platform edge, throughout its length.
- The edge of the platform is clearly marked.
- The maximum gap between the platform and train when boarding/alighting is 16cm.
- There are tube maps, tube and rail maps, Victoria line maps, digital display(s) for train times and Night Tube and London Overground maps on this platform.
- Signage on this platform includes; directional to other lines, directional to way out and level access boarding.
- Announcements on this platform are visual.
- There are 3 help points on this platform.
- The help points are fitted with hearing loop systems.
- The height of the buttons at the help point(s) are; 100cm (emergency) and 110cm (information).
- There is fixed bench seating without armrests on this platform.
- The height of the seating is 48cm.
- The width of the majority of seats is 225cm.
- The colour contrast for the seating is good.
- Perch seating is not available on this platform.
- The colour contrast between the wall and platform is good.
- Lighting levels are moderate to good.
-
Access from the Platform
View
- There is/are 2 exit point(s) from this platform.
-
Comments
View
- In the raised boarding area, the platform is level with the train, with a gap between of approximately 6cm.
There are direct walkways between this platform and platform 3 Bakerloo southbound.
- In the raised boarding area, the platform is level with the train, with a gap between of approximately 6cm.
Platform Exit (Route 1 - Exiting the Station - Leave Platform 5 and Head Towards the Victoria and Bakerloo Southbound Concourse)
-
Exit
View
- This information is for the exit located 3rd from the right as you alight the train.
- This exit is signed with 'Way out'.
- There is step-free access at this exit.
- There is an open gap to exit.
Platform(s) (Route 1 - Exiting the Station - Alight the Train onto Platform 3 (Southbound))
-
Platform Information
View
- This is a straight platform.
- The platform is flat throughout its length.
- There are tactile markings along the platform edge, throughout its length.
- The edge of the platform is clearly marked.
- The maximum gap between the platform and train when boarding/alighting is 16cm.
- There are tube maps, tube and rail maps, Bakerloo line maps and digital display(s) for train times on this platform.
- Signage on this platform includes; directional to other lines and directional to way out.
- Announcements on this platform are visual.
- There are 3 help points on this platform.
- The help points are fitted with hearing loop systems.
- The height of the buttons at the help point(s) are; 110cm (emergency) and 100cm (information).
- There is fixed bench seating with and without armrests on this platform.
- The height of the seating is 45cm.
- The width of the majority of seats is 48cm.
- The colour contrast for the seating is good.
- Perch seating is not available on this platform.
- The colour contrast between the wall and platform is fair.
- Lighting levels are good.
-
Access from the Platform
View
- There is/are 2 exit point(s) from this platform.
-
Comments
View
- From this platform there are direct walkways through to platform 5 Victoria line southbound.
Platform Exit (Route 1 - Exiting the Station - Leave Platform 3 and Head Towards the Victoria and Bakerloo Line Southbound Concourse)
-
Exit
View
- This information is for the exit located 3rd from the left as you exit the train.
- This exit is signed with 'Way out'.
- There is step-free access at this exit.
- There is an open gap to exit.
Concourse (Route 1 - Exiting the Station - Reach the Victoria and Bakerloo Line Southbound Concourse, Then Head Towards the Escalators)
-
Access
View
- There is level access throughout this concourse area.
-
Maps and Signage
View
- There are Bakerloo line maps and Victoria line maps in this concourse area.
- Signage in this concourse area includes; directional to exits and directional to lines .
-
Other Features and Facilities
View
- There is 1 help point in this concourse area.
- The help point is fitted with a hearing loop system.
- The height of the buttons at the help point(s) are; 102cm (emergency) and 110cm (information).
- The colour contrast between the walls and floor in this concourse area is fair.
- Seating is not available in this concourse area.
- The lighting levels are moderate to good.
Escalator(s) (Route 1 - Exiting the Station - Take the Escalators up to the Intermediate Concourse)
-
Escalator(s)
View
- Escalators can be used to access other floors.
- The escalator(s) is/are located at the end of the Victoria and Bakerloo line southbound concourse.
- The escalators have overhead signage for the Bakerloo line, the Victoria line and the Central line.
- The escalators only go up.
- The floors which are accessible by escalator(s) are -3 (Victoria and Bakerloo line southbound concourse) and -2 (intermediate concourse).
- The escalator(s) steps are not clearly marked.
- The foot and head of the escalator(s) are not clearly marked.
- The lighting levels at the escalator(s) are moderate to good.
Concourse (Route 1 - Exiting the Station - Reach the Intermediate Concourse, Then Head Towards the Escalators)
-
Access
View
- There is level access throughout this concourse area.
-
Maps and Signage
View
- There are tube and rail maps, Bakerloo line maps, Victoria line maps and Central line maps in this concourse area.
- Signage in this concourse area includes; directional to exits and directional to lines .
-
Other Features and Facilities
View
- There is 1 help point in this concourse area.
- The help point is fitted with a hearing loop system.
- The height of the buttons at the help point(s) are; 110cm (emergency) and 100cm (information).
- Announcements in this concourse area are audio.
- The colour contrast between the walls and floor in this concourse area is fair.
- Seating is not available in this concourse area.
- The lighting levels are moderate to good.
Escalator(s) (Route 1 - Exiting the Station - Take the Escalators up to the Ticket Hall)
-
Escalator(s)
View
- Escalators can be used to access other floors.
- The escalator(s) is/are located at the end of the intermediate concourse.
- The escalators have overhead signage for Way out.
- The escalators only go up.
- The floors which are accessible by escalator(s) are -2 (intermediate concourse) and -1 (ticket hall).
- The escalator(s) steps are not clearly marked.
- The foot and head of the escalator(s) are clearly marked.
- The lighting levels at the escalator(s) are moderate to good.
Ticket Hall (Route 1 - Exiting the Station - Pass Through the Barriers into the Ticket Hall)
-
Ticket Hall Access and Barriers
View
- The ticket hall is located at the top of the intermediate concourse to ticket hall escalators.
- There is level access throughout the ticket hall.
- The width of the standard barriers is 50cm.
- The ticket slot heights for the standard barriers are 94cm (insert ticket) and 101cm (remove ticket).
- The Oyster card reader height is 103cm for the standard barriers.
- The width of the wider access barriers is 110cm.
- The ticket slot heights for the wider access barriers are 90cm (insert ticket) and 102cm (remove ticket).
- The Oyster card reader height is 100cm for the wider access barriers.
- Staff are available to provide assistance at the barriers.
-
Maps and Signage
View
- There are tube maps, tube and rail maps, TFL maps, service update boards, service update screens, digital display(s) for train times, Night Tube and London Overground maps and bus route maps in the ticket hall.
- Signage in the ticket hall includes; directional to lines, directional to exits and TFL/tourist directional.
-
Other Features and Facilities
View
- There are 2 help points in this concourse area.
- The help points are fitted with hearing loop systems.
- The height of the buttons at the help point(s) are; 110cm (emergency) and 100cm (information).
- The Oyster machine controls/screen heights vary between 104cm and 127cm.
- The ATM controls/screen heights vary between 116cm and 135cm.
- Announcements in the ticket hall are audio.
- The colour contrast between the walls and floor in the ticket hall fair.
- Seating is not available in this ticket hall.
- The lighting levels are varied.
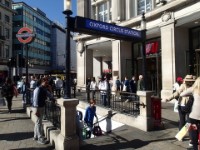
Station Exit Summary (Route 1 - Exiting the Station - Take an Exit up to Street Level)
- There is stepped access to Oxford Street east/Regent Street north via Exit 1.
- To see information for Exit 1 please click here.
- There is stepped access to Oxford Street east/Regent Street south via Exit 2.
- To see information for Exit 2 please click here.
- There is stepped access to Oxford Street west/Regent Street south via Exit 3.
- To see information for Exit 3 please click here.
- There is stepped access to Oxford Street west/Regent Street north via Exit 4.
- To see information for Exit 4 please click here.
- There is stepped access to Oxford Street west/Regent Street south via Exit 5.
- To see information for Exit 5 please click here.
- There is stepped access to Argyll Street via Exit 6.
- To see information for Exit 6 please click here.
- There is stepped access to Oxford Street east via Exit 7.
- To see information for Exit 7 please click here.
- There is stepped access to Argyll Street via Exit 8.
- To see information for Exit 8 please click here.
Station Exit (Exit 1 - Oxford Street East/Regent Street North)
-
Exit Point
View
- This information is for the exit located off the ticket hall.
- This exit is signed with 'Way out, Exit 1, Oxford Street East, Regent Street North'.
- There is stepped access at this exit.
-
Step(s)
View
- The step(s) is/are located at the exit, off the ticket hall.
- There is/are 31 step(s).
- The step(s) is/are clearly marked.
- The step(s) has/have tactile paving at the top and bottom.
- The height of the step(s) is/are between 15cm and 18cm.
- The height of the step(s) is/are 15cm.
- The going of the step(s) is/are not between 30cm and 45cm.
- There is a/are handrail(s) at the step(s).
- The handrail(s) is/are on both sides.
- Handrails are at the recommended height (90cm-100cm).
- Handrails do cover the flight of stairs throughout its length.
- Handrails are easy to grip.
- Handrails do not extend horizontally beyond the first and last steps.
Station Exit (Exit 2 - Oxford Street East/Regent Street South)
-
Exit Point
View
- This information is for the exit located off the ticket hall.
- This exit is signed with 'Way out, Exit 2, Oxford Street East, Regent Street South'.
- There is stepped access at this exit.
-
Step(s)
View
- The step(s) is/are located at the exit, off the ticket hall.
- There is/are 31 step(s).
- The step(s) is/are clearly marked.
- The step(s) has/have tactile paving at the top and bottom.
- The height of the step(s) is/are between 15cm and 18cm.
- The height of the step(s) is/are 16cm.
- The going of the step(s) is/are not between 30cm and 45cm.
- There is a/are handrail(s) at the step(s).
- The handrail(s) is/are on both sides.
- Handrails are at the recommended height (90cm-100cm).
- Handrails do cover the flight of stairs throughout its length.
- Handrails are easy to grip.
- Handrails do extend horizontally beyond the first and last steps.
Station Exit (Exit 3 - Oxford Street West/Regent Street South)
-
Exit Point
View
- This information is for the exit located off the ticket hall.
- This exit is signed with 'Way out, Exit 3, Oxford Street West, Regent Street South'.
- There is stepped access at this exit.
-
Step(s)
View
- The step(s) is/are located at the exit, off the ticket hall.
- There is/are 31 step(s).
- The step(s) is/are clearly marked.
- The step(s) has/have tactile paving at the top and bottom.
- The height of the step(s) is/are between 15cm and 18cm.
- The height of the step(s) is/are 16cm.
- The going of the step(s) is/are not between 30cm and 45cm.
- There is a/are handrail(s) at the step(s).
- The handrail(s) is/are on both sides.
- Handrails are at the recommended height (90cm-100cm).
- Handrails do cover the flight of stairs throughout its length.
- Handrails are easy to grip.
- Handrails do extend horizontally beyond the first and last steps.
Station Exit (Exit 4 - Oxford Street West/Regent Street North)
-
Exit Point
View
- This information is for the exit located off the ticket hall.
- This exit is signed with 'Way out, Exit 4, Oxford Street West, Regent Street North'.
- There is stepped access at this exit.
-
Step(s)
View
- The step(s) is/are located at the exit, off the ticket hall.
- There is/are 32 step(s).
- The step(s) is/are clearly marked.
- The step(s) has/have tactile paving at the top and bottom.
- The height of the step(s) is/are between 15cm and 18cm.
- The height of the step(s) is/are 15cm.
- The going of the step(s) is/are not between 30cm and 45cm.
- There is a/are handrail(s) at the step(s).
- The handrail(s) is/are on both sides.
- Handrails are at the recommended height (90cm-100cm).
- Handrails do cover the flight of stairs throughout its length.
- Handrails are easy to grip.
- Handrails do extend horizontally beyond the first and last steps.
Summary - Off Peak Time Routes
- Off Peak time at the station is between 10:00 and 20:00.
- Between these times, the escalators up to the ticket hall change from going both ways to only going down.
- Due to this, an alternative route must be taken involving steps and escalators.
- This alternative route leads up to the exit concourse as opposed to the ticket hall.
- There is access between the exit concourse and the ticket hall via ramp.
- These routes are detailed in the following two sections.
Route 2 - Victoria Line Southbound Platform 5 - Off Peak Time Exit (10:00-20:00)
- Route 2 - peak time exit - Victoria line southbound platform 5 to exit concourse.
- The approximate distance of this route is 80 metres (not including steps and escalators).
- This route includes; 18 steps followed by escalators.
- The steps are clearly marked and have handrails on both sides.
- There are some slight slopes along this route.
- There is a help point available along this route.
- Step 1 - as you alight the train, take the exit on the far left hand-side of the platform.
- Step 2 - having exited the platform, turn left and follow the passage for approximately 30 metres.
- Step 3 - at the end of the passage, go up the stairs and follow the second passage for approximately 30 metres.
- Step 4 - at the end of the passage, turn left and take the escalators up to the exit concourse.
- Step 5 - at the top of the escalator, go through the ticket barriers and take any exit up to street level.
Route 3 - Bakerloo Line Southbound Platform 3 - Off Peak Time Exit (10:00-20:00)
- Route 3 - peak time exit - Bakerloo line southbound platform 3 to exit concourse.
- The approximate distance of this route is 50 metres (not including steps and escalators).
- This route includes; 18 steps followed by escalators.
- The steps are clearly marked and have handrails on both sides.
- There is a help point available along this route.
- Step 1 - as you alight the train, take the exit on the far right-hand side of the platform.
- Step 2 - having exited the platform, turn right and follow the passage for approximately 20 metres.
- Step 3 - at the end of the passage, go up the stairs and follow the second passage for approximately 15 metres.
- Step 4 - at the end of the passage, turn left and take the escalators up to the exit concourse.
- Step 5 - at the top of the escalator, go through the ticket barriers and take any exit up to street level.
Station Exit (Exit 5 - Oxford Street West/Regent Street South)
-
Exit Point
View
- This information is for the exit located off the exit concourse.
- This exit is signed with 'Exit 5 - Oxford Street West, Regent Street South, Way out'.
- There is stepped access at this exit.
-
Step(s)
View
- The step(s) is/are located at the exit, off the exit concourse.
- There is/are 21 step(s).
- The step(s) is/are clearly marked.
- The step(s) has/have tactile paving at the top and bottom.
- The height of the step(s) is/are between 15cm and 18cm.
- The height of the step(s) is/are 15cm.
- The going of the step(s) is/are between 30cm and 45cm.
- There is a/are handrail(s) at the step(s).
- The handrail(s) is/are on both sides and in the centre.
- Handrails are at the recommended height (90cm-100cm).
- Handrails do cover the flight of stairs throughout its length.
- Handrails are easy to grip.
- Handrails do extend horizontally beyond the first and last steps.
- There is a second lower handrail.
Station Exit (Exit 6 - Argyll Street)
-
Exit Point
View
- This information is for the exit located off the exit concourse.
- This exit is signed with 'Exit 6'.
- There is stepped access at this exit.
-
Step(s)
View
- The step(s) is/are located at the exit, off the exit concourse.
- There is/are 22 step(s).
- The step(s) is/are clearly marked.
- The step(s) has/have tactile paving at the top and bottom.
- The height of the step(s) is/are between 15cm and 18cm.
- The height of the step(s) is/are 15cm.
- The going of the step(s) is/are between 30cm and 45cm.
- There is a/are handrail(s) at the step(s).
- The handrail(s) is/are on both sides.
- Handrails are at the recommended height (90cm-100cm).
- Handrails do cover the flight of stairs throughout its length.
- Handrails are easy to grip.
- Handrails do not extend horizontally beyond the first and last steps.
- There is a second lower handrail.
Station Exit (Exit 7 - Oxford Street East)
-
Exit Point
View
- This information is for the exit located off the exit concourse.
- This exit is signed with 'Way out, Exit 7, Oxford Street'.
- There is stepped access at this exit.
-
Step(s)
View
- The step(s) is/are located at the exit, off the exit concourse.
- There is/are 22 step(s).
- The step(s) is/are clearly marked.
- The step(s) has/have tactile paving at the top and bottom.
- The height of the step(s) is/are between 15cm and 18cm.
- The height of the step(s) is/are 15cm.
- The going of the step(s) is/are between 30cm and 45cm.
- There is a/are handrail(s) at the step(s).
- The handrail(s) is/are on both sides and in the centre.
- Handrails are at the recommended height (90cm-100cm).
- Handrails do cover the flight of stairs throughout its length.
- Handrails are easy to grip.
- Handrails do extend horizontally beyond the first and last steps.
- There is a second lower handrail.
Station Exit (Exit 8 - Argyll Street)
-
Exit Point
View
- This information is for the exit located off the exit concourse.
- This exit is signed with 'Way out, Exit 8, Argyll Street'.
- There is stepped access at this exit.
-
Step(s)
View
- The step(s) is/are located at the exit, off the exit concourse.
- There is/are 16 step(s).
- The step(s) is/are clearly marked.
- The step(s) has/have tactile paving at the top and bottom.
- The height of the step(s) is/are between 15cm and 18cm.
- The height of the step(s) is/are 16cm.
- The going of the step(s) is/are between 30cm and 45cm.
- There is a/are handrail(s) at the step(s).
- The handrail(s) is/are on both sides.
- Handrails are at the recommended height (90cm-100cm).
- Handrails do cover the flight of stairs throughout its length.
- Handrails are easy to grip.
- Handrails do extend horizontally beyond the first and last steps.
- There is a second lower handrail.
Ramp(s) or Slope(s) (Access Between the Exit Concourse and Ticket Hall)
- There is a ramp/slope located between the exit concourse and ticket hall.
- The ramp/slope is used to access the ticket hall from the exit concourse.
- The gradient of the ramp/slope is slight.
- The ramp/slope does not have resting areas.
- The ramp/slope is approximately 15m in length.
- The ramp/slope is permanent.
- There is a level landing at the top of the ramp/slope.
- There is a/are handrail(s) at the ramp.
- The handrail(s) is/are in the centre.
- Handrails are at the recommended height (90cm-100cm).
- Handrails are easy to grip.
- The lighting levels at the ramp/slope are moderate to good.
-
Comments
View
- There is a second lower handrail approximately 60cm from floor level.
Route 4 - Transfer - Victoria Line Southbound Platform 5 to Central Line Platforms
- The approximate distance of this route is 110 metres (not including steps).
- This route includes; 20 steps followed by 20 more steps.
- There are a number of slight slopes along this route.
- The steps are clearly marked and have handrails on both sides.
- There is a help point available along this route.
- Step 1 - as you alight the train, take the exit second from the left of the platform.
- Step 2 - having exited the platform, turn left and follow the passage for approximately 10 metres, then turn right (follow Central line signage).
- Step 3 - from here, turn left again and head approximately 10 metres towards the steps.
- Step 4 - take the steps down, then follow the passage round to the left for approximately 50 metres.
- Step 5 - from here, continue to follow the passage round to the right for approximately 35 metres until reaching the steps.
- Step 6 - take the steps down, then turn right to access the Central line westbound platform (1) or left to access the Central line eastbound platform (2).
Route 5 - Transfer - Bakerloo Line Southbound Platform 3 to Central Line Platforms
- The approximate distance of this route is 110 metres (not including steps).
- This route includes; 20 steps followed by another 20 steps.
- There are a number of slight slopes along this route.
- The steps are clearly marked and have handrails on both sides.
- There is a help point available along this route.
- Step 1 - as you alight the train, take the exit third from the right of the platform.
- Step 2 - having exited the platform, turn right and follow the passage for approximately 5 metres, then turn left (follow Central line signage).
- Step 3 - from here, turn right again and head approximately 10 metres towards the steps.
- Step 4 - take the steps down, then follow the passage round to the left for approximately 50 metres.
- Step 5 - from here, continue to follow the passage round to the right for approximately 35 metres until reaching the steps.
- Step 6 - take the steps down, then turn right to access the Central line westbound platform (1) or left to access the Central line eastbound platform (2).
Route 6 - Transfer - Victoria Line Southbound Platform 5 to Bakerloo Line Northbound Platform 4
- The approximate distance of this route is 80 metres (not including steps).
- This route includes; 18 steps followed by another 18 steps.
- There are some slight slopes along this route.
- The steps are clearly marked and have handrails on both sides.
- There is a help point available along this route.
- Step 1 - as you alight the train, take the exit on the far right hand-side of the platform.
- Step 2 - having exited the platform, turn right and follow the passage for approximately 20 metres towards the steps (follow Victoria and Bakerloo line northbound platforms signage).
- Step 3 - take the steps up, then follow the passage round to the left for approximately 30 metres until you reach the second set of steps.
- Step 4 - take the steps down, follow the passage ahead for approximately 10 metres, then bare left and head towards the Bakerloo line northbound platform access points.
- Step 5 - take the second access point from the left and enter the Bakerloo line northbound platform (4).
Route 7 - Transfer - Victoria Line Southbound Platform 5 to Bakerloo Line Southbound Platform 3
- The approximate distance of this route is 20 metres.
- There are no steps along this route.
- There are no help points available along this route.
- Step 1 - as you alight the train, take the exit in the middle of the platform (follow Bakerloo line southbound platform 3 signage).
- Step 2 - having exited the platform, follow the passage ahead for approximately 20 metres.
- Step 3 - at the end of the passage, enter the Bakerloo line southbound platform (3).
Route 8 - Transfer - Bakerloo Line Southbound Platform 3 to Victoria Line Northbound Platform 6
- The approximate distance of this route is 80 metres (not including steps).
- This route includes; 18 steps followed by another 18 steps.
- There are some slight slopes along this route.
- The steps are clearly marked and have handrails on both sides.
- There is a help point available along this route.
- Step 1 - as you alight the train, take the exit on the far left hand-side of the platform.
- Step 2 - having exited the platform, turn left and follow the passage for approximately 15 metres towards the steps (follow Victoria and Bakerloo line southbound platforms signage).
- Step 3 - take the steps up, then follow the passage round to the left for approximately 30 metres until you reach the second set of steps.
- Step 4 - take the steps down, follow the passage ahead for approximately 10 metres, then bare right and head towards the Victoria line northbound platform access points.
- Step 5 - take the first access point on the right and enter the Victoria line northbound platform (6).
Route 9 - Transfer - Bakerloo Line Southbound Platform 3 to Victoria Line Southbound Platform 5
- The approximate distance of this route is 20 metres.
- There are no steps along this route.
- There are no help points available along this route.
- Step 1 - as you alight the train, take the exit in the middle of the platform (follow Victoria line southbound platform 5 signage).
- Step 2 - having exited the platform, follow the passage ahead for approximately 20 metres.
- Step 3 - at the end of the passage, enter the Victoria line southbound platform (5).