
Access Guide
Introduction
- There is approximately one mile between the Pollock Hall of residence and Potterrow. This route takes you via George Square.
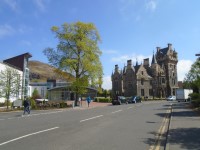
Pollock Halls of Residence
- There is step free access to the Reception Centre, and the concourse in front of it, from all Halls of Residence at Pollock Halls.
- Accessible toilets are available in the Reception Centre.
- There is step free access to exit the Reception Centre.
- Car Parking facilities are available throughout the Halls of Residence.
- For more information about Pollock Halls Reception Centre please click here (opens in new tab).
Pollock Halls to Holyrood Park Road
- Turn left for 33m as you exit Pollock Halls and use the pedestrian crossing to cross Holyrood Park Road.
- As you leave Pollock Hall turn left.
- There is a tactile drop kerb which you will need to bypass.
- The surface of the pavement is block paving.
- On both sides of the road and the island there are drop kerbs.
- There are traffic lights located here.
- As you head towards the island from the near side of the road traffic is coming from the right. As you head from the island to the far side of the road traffic approaches from the left.
Holyrood Park Road to Dalkeith Road
- Turn left up Holyrood Park Road for 150m to reach Dalkeith Road
- The surface of the pavement is block paving with manhole covers.
- There is a slight gradient towards the road.
- After approximately 33m there is a service road that must be overcome which has tactile drop kerbs on either side and a central tactile island with drop kerbs. This can be seen in photograph 2.
- After crossing the road, continue on until you reach Dalkeith Road.
Dalkeith Road to Parkside Terrace
- Turn right for 130m down Dalkeith Road until you reach Parkside Terrace
- As you turn the corner onto Dalkeith Road there is tactile paving for a pedestrian crossing which can be seen in photographs 1 & 2. Cross over the paving and continue down Dalkeith Road.
- The surface of the pavement is block paving with manhole covers.
- There is a slight gradient towards the road.
- There are two sets of traffic lights with tactile drop kerbs across Dalkeith Road.
Cross Parkside Terrace
- There are drop kerbs on either side.
- The near side is block paving the far side is concrete. Neither side has tactile paving.
- The road is tarmac with a camber in the middle.
- Traffic approaches this road from both directions.
Dalkeith Road to St Leonard's Street
- Head down Dalkeith Road for 90m until it becomes St Leonard's Street
- The surface of the pavement is concrete with the occasional manhole covers.
- There is a slight gradient towards the road.
- There is a downhill gradient as you head down the hill.
- There is a bus stop along the pavement after 65m. This can be seen in photograph 3.
- After another 25m the Dalkeith Road comes to an end and St Leonard's Street begins.
- There is no clear distinction or separation between Dalkeith Road and St Leonard's Street on this side of the pavement. The easiest way to tell where Dalkeith road becomes St Leonard's street is that you can see Lutton Place on the other side of road.
St Leonard's Street
- For 65m continue along St Leonard's Street.
- The surface of the pavement is concrete with the occasional manhole cover.
- There is a slight gradient towards the road.
- There is a downhill gradient as you head down the hill.
- There is a service road with drop kerbs on either side after 50m as can be seen in photographs 2 & 3.
St Leonard's Street to Parkside Street
- For 80m continue along St Leonard's Street until you reach Parkside Street.
- After 35m there is a bus stop blocking the pavement, which can be seen in photograph 3.
- To get around it head to your right over an area that is a mixture of cobbled and block paved surfaces. Shown in photographs 4 & 5.
- After this return to the pavement. This area can be seen in photograph 6.
- Continue along St Leonard's Street until you reach Parkside Street.
Cross Parkside Street
- There are tactile drop kerbs either side of the road.
- The surface of the road is tarmac.
- After crossing over the road, you will need to travel over a cycle path there is tactile paving on either side.
- The road is tarmac with a camber in the middle.
- Traffic approaches this road from both directions.
St Leonard's Street to St Leonard's Lane
- After crossing Parkside Street, continue for 95m along St Leonard's Street until you reach St Leonard's Lane.
- After 12m there is tactile paving for a pedestrian crossing across St Leonard's Street. This can be seen in photograph 2.
- The surface of the pavement is concrete with the occasional manhole cover.
- There is a slight gradient towards the road.
- There is a downhill gradient as you head down the hill.
- There is a cycle path to the left of the pavement.
- After 40m there is a tarmac service road with tactile paving on each side. The road is level with the pavement. This can be seen in photograph 3.
- After which continue along St Leonard's Street to St Leonard's Lane.
Cross St Leonard's Lane
- There are tactile drop kerbs on either side of the road.
- The surface of the road is tarmac.
- Traffic approaches this road from both directions.
Cross St Leonard's Street and Rakeillor Street
- After crossing St Leonard's Lane immediately turn left and cross St Leonard's Street at the pedestrian crossing. This crossing can be seen in photographs 1, 2, 3 & 4.
- There is block paving between the St Leonard's Lane Crossing and the St Leonard's Street crossing.
- There are traffic lights at the pedestrian crossing.
- There are tactile drop kerbs on either side and the road is tarmac.
- Traffic approaches this road from both directions.
- St Leonard's Street is a busy road.
- Turn right heading over a small section of block paving until you reach a tarmac cycle path. This can be seen in photograph 5.
- After which cross Rakeillor Street. Rakeillor Street is level with the pavement, has tactile paving on either side and has a tarmac surface. It can be seen in photograph 6.
- Traffic approaches this road from both directions.
St Leonard's Street to East Crosscauseway
- Turn right for 125m heading down St Leonard's Street until you reach East Crosscauseway
- The pavement is concrete with the occasional manhole cover.
- After 40m you will encounter the service road for Hamilton Folly Mews.
- There are tactile drop kerbs either side of the cobbled road to Hamilton Folly Mews.
- After this, the pavement is concrete with the occasional manhole cover.
East Crosscauseway to Cowan Close
- Turn left for 105m and head up East Crosscauseway until Cowan Close.
- The surface of the pavement is concrete with manhole covers.
- After 32m there are drop kerbs on either side of St John's Place.
- The surface of the road in tarmac.
- Traffic may approach the crossing from either direction.
- After crossing St John's Place continue until you reach Cowen's Close.
Cross Cowan Close
- Cowan close has no drop kerb on its near side.
- Surface of the road is tarmac.
- There is a drop kerb on the far side.
- Traffic may approach the crossing from either direction.
East Crosscauseway to St Patrick Street
- For 50m continue up East Crosscauseway until you reach St Patrick Street.
- There is a slight uphill gradient as you head towards St Patrick Street.
- Head along East Crosscauseway the surface of the road is tarmac with the occasional manhole cover.
- Towards the end of the road the pavement is only 85cm, in width as can be seen in photograph 3.
St Patrick Street to Nicolson Street
- Turn along St Patrick Street for 105m until you reach the pedestrian crossing across St Patrick Street next to West Richmond Street.
- As you turn right there is a tactile drop curb in front of you. This can be seen in photograph 1.
- It forms part of a small tarmac road. It's level with the pavement with tactile paving on either side. This can be seen in full in photograph 2.
- After this, continue up the St Patrick's Street until you reach the Nicolson Street crossing next to West Richmond Street.
- The surface of the road is block pavement with manhole covers.
- There is a slight gradient to the road.
Cross Nicolson Street and West Nicolson Street
- There are traffic lights to cross Nicolson Street.
- There are tactile drop kerbs on either side.
- There is a camber in the middle of the road.
- There is traffic approaching in both directions on this busy road.
- This crossing across Nicolson Street can be seen in photographs 1, 2 & 3.
- Turn right immediately and cross West Nicolson Street.
- There are traffic lights to cross West Nicolson Street.
- There are tactile drop kerbs on either side.
- There is a camber in the middle of the road.
- There is traffic approaching from both directions on this busy road.
- This crossing across West Nicolson Street can be seen in photographs 4 & 5.
Nicolson Street to Chapel Street
- Turn Left for 115m down Nicolson Street
- The surface of the pavement is block paving with the occasional manhole cover.
- There is a slight gradient to the road.
Chapel Street to Crichton Street
- For 26m turn right up Chapel Street and cross the road at the pedestrian Crossing then turn right for 18m to reach Crichton Street
- The surface of the road is block paving with occasional manhole covers.
- There is a set of traffic lights at the pedestrian crossing with tactile drop kerbs at either side.
- The surface of the road is tarmac and there is a camber in the middle.
- The road is busy and traffic flows in both directions.
- On the other side turn right for 18m to reach Crichton Street.
Crichton Street to Charles Street
- Cross Crichton Street then turn left for 75m into Charles Street.
- There is a pedestrian crossing with tactile paving on either side.
- The surface of the road is tarmac.
- The surface of the pavement is block paving with the occasional manhole cover.
- As you near Charles Street you will find in front of the Informatics Building, there is a downhill gradient away from the road.
Charles Street to Bristo Place
- Turn Right for 100m up Charles Street until you reach Bristo Place.
- The surface of the pavement is block paving with the occasional manhole cover.
- There is an uphill gradient.
- As you continue there is a rubbish bin in the middle of the pavement restricting the width of the pavement around it. With a width of 110cm to the right and 90cm to the left.
- Continue onwards until you reach Bristo Place.
Bristo Square to Potterrow
- Turn right for approximately 55m to reach Potterrow.
- There is an uphill gradient to Bristo Place.
- The surface of the place is concrete followed by a mixture of block paving and cobbled surfaces.
- As you proceed, you will find the entrance to Potterrow on your right after passing 7 Bristo Square.