

Access Guide
Summary
- The following information describes the route from the Main Quad to IOE via Gower Street, Torrington Place, Byng Place, Gordon Square and Bedford Way.
- The approximate distance of this route is 650 metres.
- The route takes approximately 8 minutes.
- The following information describes the route from the Main Quad to the Cruciform Building via Gower Street.
- The approximate distance of this route is 100m.
- The route takes approximately 2 minutes.
- The majority of paths along the route consist of tarmac or block paving with some slight gradients in places.
- The potential hazards on this route include; busy roads, crossing points (Torrington Place, Malet Place, Woburn Square) and congested pathways.
- For further information regarding the Cruciform Building please click here.
Main Quad
- The Main Quad is located off Gower Street.
- At the entrance/exit of the Main Quad there are two 85cm wide gates for pedestrians (photographs 7 and 8).
- These gates are located on either side of the 330cm wide main gate used by both vehicles and pedestrians (photograph 6).
- There are also bollards located immediately beyond/before the gates as you enter/exit the Main Quad (photograph 6).
- These bollards have gaps between 90cm-120cm wide.
- The Chadwick, North-West Wing, North Wing (Slade Building), Wilkins Buildings (including North and South Cloisters) and South Wing can be accessed via the Main Quad.
- Only the Chadwick, North-West Wing and Wilkins Buildings (except North Cloisters) are accessible via external ramps.
- Please see the relevant access guides for further information regarding access to these buildings.
- The majority of the Main Quad has a tarmac surface.
- The tarmac is loose/uneven in places.
- There are easy gradients throughout the Main Quad including on the pedestrian pathways.
- The pathways (photograph 9) consist mostly of block paving and are narrow and uneven in places.
- There is ample seating available in the form of wooden benches (photograph 10).
- These are located along the entirety of the pathways.
- There are 2 Blue Badge bays available within the quad (photographs 11 and 12).
- These are located on either side of the main building.
- There is an information point located at the front lodge, on the left hand side of the Main Quad entrance/exit gates (photograph 13).
- Please see the relevant access guide for further information regarding the front lodge information point.
Main Quad to Torrington Place Turning
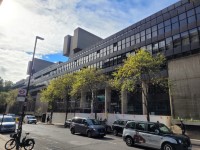
- Upon exiting the Quad, turn left and head along Gower Street for approximately 240 metres towards Torrington Place.
- The path along this section of the route consists mostly of tarmac with sections of brick paving and concrete when exiting the quad.
- The path is mostly level with easy gradients in places.
- The path is uneven in places partly due to lowered drain hole covers (photograph 4).
- Upon reaching the Torrington Place turning, turn left.
- There is tactile paving across the pathway at the turning (photograph 10).
- There is also a university map column located at the turning (photograph 11).
Torrington Place Crossing
- The Crossing has tactile paving and dropped kerbs on both sides.
- There are slight slopes/ gradients between the path and the road on both sides.
- The road surface has a slight camber and consists of tarmac.
- The road is mostly even with uneven areas.
- There are visual signals available at this crossing.
- The visual signals are activated via push buttons. These are between the heights of 100cm and 106cm.
- There are rotating cones located at the base of the push button boxes to indicate when it is safe to cross.
- Traffic flow is from the right hand side for vehicles and the left hand side for cyclists.
Torrington Place Crossing to Malet Street Crossing
- Having Crossed over Torrington Place, turn left and continue ahead along Torrington Place for approximately 55 metres towards the Malet Street Crossing.
- The path along this section of the route consists of block paving.
- There is a slight easy gradient sloping towards the road along the entirety of the path.
- The path also has an easy gradient downhill slope along its entirety.
- The path is mostly even with the exception of raised paving slabs in places along the left hand side.
- This is caused by tree roots.
- The path narrows in places due to obstructions such as shop signage and trees/ bicycle racks to one side (photograph 2 and 3).
Malet Street Crossing
- Upon reaching the end of the path, cross the road over Malet Place.
- The crossing has tactile paving and dropped kerbs on both sides.
- There are easy gradients between the path and the road on both sides.
- The road surface has a slight uphill easy gradient along its entirety.
- The road surface consists of tarmac and is mostly even.
- There are no visual signals available at this crossing.
- Traffic flow is from the right hand side for vehicles and the left hand side for cyclists.
Malet Street Crossing to Byng Place
- Having crossed over Malet Street, continue ahead along Torrington Place for approximately 50 metres towards Byng Place.
- The path along this section of the route consists of block paving.
- There is tactile paving across the path (photograph 2) approximately 7 metres beyond the crossing.
- There is an easy downhill slope along the entirety of the path.
- The path is mostly even with uneven areas.
- After approximately 40 metres, there is a vehicle access road crossing.
- The crossing has no tactile paving.
- The crossing has dropped kerbs on both sides.
- The path is level with the road on both sides.
- The road surface consists of brick paving and dips in the centre due to a drain.
- The road is mostly even with uneven areas.
- When crossing, be wary of vehicles entering/exiting the road.
Woburn Square Crossings
- The crossing has tactile paving and dropped kerbs on both sides.
- There are steep gradients between the path and the road on both sides.
- The road surface consists of tarmac
- The road surface has a slight camber and is mostly even.
- There are no visual signals available at this crossing.
- When crossing, be wary of vehicles entering/exiting Woburn Square.
- Approximately 15 metres after crossing over Woburn Square, there is a similar crossing also called Woburn Square (photographs 7 and 8).
- This crossing has an slight gradient between the path and the road on one side and steep on the other.
- The path between the two crossings consists of block paving and has a slight camber.
- There is tactile paving across the road immediately beyond the first crossing (photographs 5 and 6).
- The path is mostly even with uneven areas due to lowered/raised drain covers.
Woburn Square Crossings to Bedford Way Turning
- Having traversed both Woburn Square crossings, continue ahead for approximately 70 metres towards the Bedford Way crossing.
- The path along this section of the route consists of block paving.
- The path has a slight easy gradient sloping towards the road along its entirety.
- The path also has an easy uphill slope along its entirety.
- The path is mostly even with uneven areas due to lowered/raised drain hole covers (photographs 3, 5, 6).
- Upon reaching the end of the path, turn right past the phone box and onto Bedford Way.
- The path to the left of the phone box has tactile paving across it (photograph 6).
- The path to the right of the phone box avoids the tactile paving but is slightly uneven due to lowered/raised paving slabs (photograph 9).
Bedford Way Turning to IOE
- Having turned, continue ahead along Bedford Way for approximately 150 metres towards the IOE.
- The path along this section of the route consists of block paving.
- The path has a slight uphill slope along its entirety as well as a slight easy gradient slope towards the road.
- The path is mostly even with uneven areas due to lowered/raised drain hole covers.
- Stay right to avoid the trees that line the left hand side of the path.
- There are entrances either side of the main entrance of the IOE that both have step free access. The entrance with a platform lift beyond the entrance is shown in photographs 6 and 7.
- Th entrance to the left of the main entrance is shown in photographs 8 and 9. It was closed for renovation at time of survey (September 2022).
- The IOE main entrance (photograph 10) has no step free access. It was also undergoing work but was in use.
- For further information regarding access into the IOE please see the relevant access guide.