
Access Guide
Introduction (Route Summary)
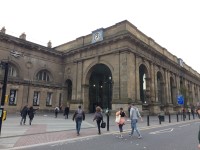
- Related link Newcastle Central Station.
- Https://www.accessable.co.uk/access-guide/newcastle-city-council/newcastle-central-station
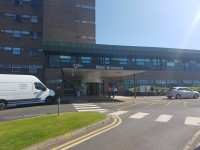
- Related link Freeman Hospital.
- Https://www.accessable.co.uk/organisations/the-newcastle-upon-tyne-hospitals-nhs-foundation-trust/freeman-hospital
-
Comments
View
- This route plan takes you from Newcastle Central Station to Freeman Hospital.
- There are two transport options in this guide.
- Route 1 is by bus and takes you to the Outpatients entrance at Freeman Hospital.
- Route 2 is by Metro and takes you to the accessible entrance at the rear of the Freeman Hospital.
Route 1 By Bus - Newcastle Central Station to Neville Street
- This section of the route is approximately 15m long.
- Exit the station at the front right hand side from the concourse.
- Proceed to the pedestrian controlled crossing on Neville Street.
- The surface is paving stones.
Route 1 By Bus - Neville Street Crossing
- The crossing at Neville Street is a pedestrian crossing.
- There is a level kerb and tactile paving at each side of the crossing.
- The control box is 110cm high.
- There is a rotating cone beneath the control box which indicates when it is safe to cross.
- There is also visual and audible warning.
- Traffic comes from the left and right.
- There are bollards after crossing Neville Street.
- The bollards are 100cm high with a width of 130cm between them.
- The bollards contrast with the pavement but do not have an visual identification strip.
Route 1 By Bus - Neville Street to Grainger Street Crossing
- Continue straight ahead and proceed along Grainger Street to the pedestrian crossing at the junction with Westgate Road.
- At the end of Grainger Street before the pedestrian crossing there are bollards.
- Grainger Street is pedestrianised and the surface is block paved.
- The bollards are 100cm high and the width between them is 200cm.
- The bollards do not contrast with the paving and do not have and identification strip.
Route 1 By Bus - Grainger Street Crossing
- The crossing at Grainger street is a pedestrian crossing.
- The crossing has tactile paving and level kerbs.
- The height of the crossing button is 109cm.
- There is a rotating cone beneath the crossing button to indicate when it is safe to cross.
- There is also a visual and audible warning.
- Traffic comes from the left and right.
Route 1 By Bus - Grainger Street Crossing to Central Station Westgate Road Stand M
- Immediately after crossing Grainger Street turn left and proceed along Westgate Road.
- After 17m proceed across the access road to The Mile Castle.
- The crossing has tactile paving and dropped kerbs.
- Central Station Westgate Road Stand M is ahead on the left.
- Take the number 38 bus to Freeman Hospital.
Route 1 By Bus - Bus Stop to Freeman Road Crossing
- This section of the route is approximately 43m.
- Exit the bus at Freeman Hospital bus stop on Freeman Road.
- After exiting the bus turn right and proceed along Freeman Road until you reach the pedestrian crossing.
- There is a barrier next to the road.
- The pavement surface is tarmac.
Route 1 By Bus - Freeman Road crossing
- There is a pedestrian crossing to cross Freeman Road
- There is a dropped kerb and tactile paving on either side of the road.
- There is a push button box on the right hand side.
- The control box buttons are 95cm high.
- There is a rotating cone underneath the control box to indicate when it is safe to cross.
- There is also visual and audible indicators.
- The crossing is 6m wide.
- Traffic comes from the left and right.
Route 1 By Bus - Freeman Road Crossing to Internal Access Road
- This section of the route is approximately 195m.
- After crossing Freeman Road turn left and proceed along Freeman Road.
- The pavement surface is tarmac.
- After 7m there is a lamppost on the right of the pavement.
- At the bus stop turn right and proceed under the canopy for 10m.
- Exit the canopy into the Hospital car park.
- Proceed along the access route through the car park.
- There are 3 raised crossing points.
- The crossing points are marked in black and white.
- The pavement and car park surfaces are tarmac.
- There are bollards on the route before the first and third crossing points.
- The bollards are 103cm high
- The bollards reduce the pavement width to 126cm, however, there is block paving to either side of the tarmac.
- Traffic comes from right at the first crossing.
- Traffic comes from the left at the second crossing.
- Traffic comes from the right at the third crossing
- Continue through the car park to the payment machines.
- There is a bin in the pavement at the side of the pay machines and before the internal access road crossing.
- Bear left and proceed to the zebra crossing at the access road.
Route 1 By Bus - Internal Access Road Crossing
- There is a zebra crossing to cross the internal access road.
- There is tactile paving and a dropped kerb at both sides of the crossing.
- The surface of the crossing is tarmac.
- The crossing is 6m wide.
- Traffic comes from the left and right.
- There is a sign showing the accessible route at the end of the crossing.
Route 1 By Bus - Internal Access Road Crossing to Outpatients Entrance
- Continue straight along the path.
- The gradient of the path is an easy upwards slope.
- There is bench seating at either side of the path.
- The surface is tarmac which is uneven in places.
- For 31m continue to follow the path onto a wide paved area.
- Bear slightly right and continue to follow the signs towards the hospital building.
- There is an easy slope on the paved area.
- At the end of the paving stones cross the ambulance and drop off access road towards Outpatients Department.
- There are bollards at the crossing, with a width over 150cm.
- The crossing is marked in black and white with rainbow edging
- Traffic comes from left.
- There is level access to the crossing at both sides.
- The crossing is 6m wide.
- After crossing the road the Outpatients Department entrance is immediately ahead.
Route 1 By Bus - Outpatients Entrance to Main Hospital Entrance
- After crossing the access road turn left.
- The surface of the path is paved.
- There are 3 bollards on the left.
- The bollards are 92cm high with a distance of 480cm between them.
- The bollards contrast with the paving and have an identification strip.
- There is bench seating on the right.
- Continue along the path for 33m to the main hospital entrance.
Route 2 By Metro - Newcastle Central Station to Longbenton Metro Station
- Newcastle Central Station is located above the Central Metro Station.
- Proceed to Platform 2 of the Metro Station and take the Yellow Line train towards The Coast.
- Exit the Metro at Longbenton Metro Station.
Route 2 By Metro - Longbenton Metro Station to Benton Park Road
- This section of the route is approximately 61m in length.
- Exit the station and bear left onto Lealholm Road.
- There is an easy slope in front of the station, leading to the road.
- The surface is paving slabs.
- There are bollards just before the road.
- The minimum width between the bollards is 125cm.
- There is a dropped kerb on the station side of the road without tactile paving.
- The road is quiet.
- There is a shallow kerb on the opposite side of the road.
- Bear slightly left and then turn right onto Glaisdale Road.
- There is an easy slope upwards along Glaisdale Road.
- The surface is paving which is uneven in places.
- At the end of Glaisdale Road turn right onto Benton Park Road.
- Proceed to the pedestrian crossing.
Route 2 By Metro - Benton Park Road Crossing
- There is a pedestrian crossing to cross Benton Park Road.
- The crossing has dropped kerbs and tactile paving on both sides.
- The pedestrian crossing is controlled by push button.
- The height of the push button is 106cm.
- There is a rotating cone underneath the control box to indicate when it is safe to cross.
- There are also visual and audible indicators.
- The road is busy with traffic coming from the left and right.
- The crossing is 7m wide.
Route 2 By Metro - Benton Park Road to Shared Pathway
- This section of the route is approximately 133 metres long.
- After crossing Benton Park Road turn left.
- The surface is paved.
- There is a barrier along the left side of the pavement.
- Proceed along Benton Park Road for 7m to the first turning on the right.
- The path is an easy uphill slope .
- The surface is tarmac with grass on each side.
- There is a lamppost on the right hand side.
- Follow the road around to the right for 22m.
- Turn right onto Cosgrove Court and proceed to the end of the street.
- Cosgrove Court is an easy long slope.
- The surface is tarmac.
- There is a bin on the right after 82m.
- Continue for a further 24m to the shared pathway.
Route 2 By Metro - Shared Pathway to Freeman Hospital Grounds
- At the end of Cosgrove Court the pathway becomes a shared space with cycles.
- The pathway is approximately 83m long.
- There is an easy slope along the shared pathway.
- There are barriers to slow cyclists along the route.
- The minimum width between the barriers is 125cm.
- There is a second set of barriers after approximately 135m.
- The minimum width between the barriers is 134cm.
- There is a third set of barriers after approximately 96m.
- The minimum width between the barriers is 121cm.
- Immediately beyond the third set of barriers the gradient increases, but is still easy.
- After approximately 12m the pathway joins another cycle and pedestrian pathway.
- Proceed across the pathway bearing slightly to the right and proceed into the Freeman Hospital grounds.
Route 2 By Metro - Freeman Hospital Grounds to Freeman Hospital Accessible Entrance
- This section of the route is 60m long.
- After entering the Freeman Hospital grounds the pathway is tarmac which then changes to paving slabs.
- There is an easy gradient downhill, and then back uphill, as you proceed along the path.
- There is tactile paving before the surface changes.
- There is a raised lip between the cycle path from the pedestrian path.
- The cycle path is on the left.
- There is tactile ribbed paving as you reach the end of the pathway.
- There is clear directional signage for the buildings within the hospital grounds.
- At the end of the path turn left and proceed past the cycle parking.
- The pathway has an easy uphill gradient.
- After 10m there is a steep short downhill slope to the zebra crossing on the right.
- The crossing has tactile paving and a dropped kerb.
- The crossing is block paved black and white.
- The crossing is 4m wide.
- There are bollards at the opposite side of the crossing.
- The bollards are 110cm high and the minimum width between the bollards is 185cm.
- There is a second similar crossing immediately beyond this crossing.
- There are bollards at the second crossing.
- The road is usually quiet and is an access road for drop offs at the hospital entrance.
- The Freeman Hospital accessible entrance is immediately ahead.
Outside Access (Main Entrance)
-
Entrance Details
View
- This information is for the entrance located at the front of the building.
- The entrance area/door is not clearly signed.
- There is ramped/sloped access at this entrance.
- There is a canopy or recess which provides weather protection at this entrance.
- The entrance door(s) does not/do not contrast visually with its immediate surroundings.
- The main door(s) open(s) by revolving.
- The width of the door opening is 214cm.
- There is a small lip on the threshold of the entrance, with a height of 2cm or below.
-
Ramp/Slope Details
View
- The ramp/slope is located in front of the entrance.
- The ramp/slope gradient is easy.
- The ramp/slope is permanent.
- There is not a level landing at the top of the ramp/slope.
Related Access Guides
- To view other Detailed Access Guides that are related to this one please use the links below.
- Freeman Hospital Main Entrance link (new tab) - click here.
- Newcastle Central Station link (new tab) - click here.