Access Guide
Shared Section (Useful Information)
Useful Information
- Suug The Disability and Neurodiversity team are located in Founder's East. They offer support and information to students who have disclosed a disability, long standing medical condition, specific learning difficulty or mental health condition. Drop in online or go to FE153 on Tuesday, Wednesday or Thursday 11am to 2pm.
- To see more information on the Disability and Neurodiversity team please click here (opens new tab).
- Telephone Number: 01784 414 621.
- Email: [email protected].
- The Student Services Centre offers help and advice to all students.
- To see more information on Student Services Centre please click here (opens new tab).
- Telephone Number: 01784 276 641.
- Email: [email protected].
- To see more information on Accommodation please click here (opens new tab).
Introduction
- This route leads from the Founders Building to the Sports Centre. This route is approximately 700m via the Emily Wilding Davison Building, the Union Shop, Arts Building, The Hub and Runnymede, Tuke, Williamson and Butler accommodation halls.
- The main hazards along this route are uncontrolled road crossings, steep slopes and congested pavements.
Founders Square
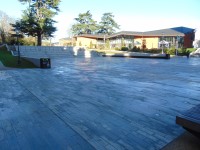
- The Founders Square is an open events space located between the Emily Wilding Davison Building and the Founders Building.
- This area is accessed via steps or ramps from the Emily Wilding Davison Building, by ramped access from the north of the campus and stepped access only from the south.
- This area has a level and even stone slab surface.
- This area contains a wide open space lined with bench seating on three sides (as shown in photographs 5 and 6) and by a tiered stone bench seating array on the north side of the square. This tiered seating is access via 15+, medium height steps with handrails on the left only.
Founders Square to the Wooded Path
- Exit Founders Square using the steps and ramp in front of the Emily Wiling Davison building.
- There are 12 well marked, medium depth steps with central handrails and tactile paving at the top and bottom of the steps.
- The ramp leads through steps from the bottom left corner to the right halfway up the steps and then back to the top left corner of the steps.
- The ramp has a slight gradient, no handrails and is poorly marked and edged by steps.
- The ramps and steps are shown in photographs 1, 2 and 3.
- At the top of the steps/ramp head straight bearing slightly to the left to pass between the Emily Wilding Davison Building and Windsor Building.
- The path here has an even and level stone slab surface.
- Follow the side of the Emily Wilding Davison Building.
- At the corner of the Emily Wilding Davison Building on which is located the Union Shop, there is a double line of low level planters containing trees which mark the edge of pavement and the Bedford Building access road.
- The low level planters are approximately 3m apart, shown in photograph 4.
- Cross the Bedford Building access road.
- This crossing is level with no tactile paving.
- This crossing is shown in photograph 5.
- Turn right after crossing and head between the Arts Building (on your left) and the Emily Wilding Davison Building (on your right).
- The path here has an even tarmac surface with a slight downhill slope.
- After approximately 70m when passing the end of the Arts Building, bear right and cross the access road area.
- This crossing is very quiet, level and has no tactile paving.
- This crossing is shown in photographs 10 and 11.
- After crossing, join the path leading directly ahead through the trees as shown in photograph 12.
Wooded Path to The Hub
- The wooded path has an even tarmac surface with a steep downhill gradient.
- After approximately 60m turn left as the path splits (the right path leads to the Jane Holloway Hall).
- The path continues with an even and level tarmac surface.
- After approximately 65m the path exits the woods adjacent to the Electron Microscopy Unit, shown in photographs 7 and 8.
- Follow the path to right as you pass the Electron Microscopy Unit.
- Cross the access road which leads to the Gower and Wedderburn accommodation blocks.
- This crossing is level with tactile paving on both sides.
- This crossing is shown in photographs 10 and 11.
- Cross The Hub car park exit directly in front of you.
- This crossing is level with tactile paving on both sides.
- This crossing is shown in photographs 11 and 12.
- Continue straight along the path.
- There is a short steep slope leading away from the crossing.
- The path levels out after 5m and has an even and level tarmac surface.
- There is a dropped kerb and tactile paving on the left of the pavement which leads to the Butler, Williamson and Reid accommodation blocks.
- Continue to cross the Hub car park entrance.
- This crossing is level with tactile paving on both sides.
- This crossing is shown in photographs 15 and 16.
- The entrance to The Hub is located on your right as you exit the crossing.
The Hub to Runnymede Hall 1
- After passing The Hub entrance cross the car park 6A access road.
- This crossing is level with tactile paving on both sides.
- This crossing is shown in photographs 2 and 3.
- Continue along the pavement in front of the Tuke accommodation building.
- The pavement here has an even tarmac surface with a slight downhill gradient.
- After 45m there is a blue badge bay located on the right of the pavement, shown in photograph 6.
- Continue along the pavement.
- After approximately 10m the pavement bears right around a loading bay area, shown in photographs 7 and 8.
- After approximately 5m turn left to cross the Runnymede Hall access road.
- Cross here bearing slightly right towards Runnymede 2 Block V.
- This crossing is level with no tactile paving on both sides.
- This crossing is shown in photographs 9 and 10.
- Turn right after cross the university access road to pass in front of the Runnymede 2 Block V.
- The pavement here has an even tarmac surface with a steep slope.
- Beyond the Runnymede 2 Block V the pavement bends to the left around two parking spaces and carries on in the same direction, shown in photographs 13, 14 and 15.
- Continue along the pavement to Runnymede 1 Halls.
- The pavement here is tarmac with a slight slope.
Runnymede Hall 1 to The Sports Centre Car Park
- At the entrance to the Runnymede 1 Halls exit the pavement into the road.
- There is a mix of tactile paving and tarmac with a short steep slope upon entering road.
- This is shown in photographs 1 and 2.
- Keep on the left of the road.
- The road here has an even tarmac surface with a steep gradient.
- Cross the car park 8 access road.
- This is shown in photographs 3 and 4.
- There is a speed bump in the road causing a short steep ramp on the far side of the crossing, shown in photograph 5.
- At far end of the Runnymede 1 Halls turn left on to a path.
- At the entrance to the path there is a dropped kerb, shown in photographs 6 and 7.
- Follow the path for approximately 90m.
- The path has an even tarmac surface with a steep downhill gradient.
- This path leads into the Sports Centre Car Park.
The Sports Centre Car Park to The Sports Centre
- Cross the Sports Centre car park at the end of path.
- This zebra crossing on the nearside is level and has a dropped kerb on the far side with tactile paving on both.
- This crossing is shown in photographs 1 and 2.
- Turn right after crossing along the side of the Sports Hall.
- This path has an even and level tarmac surface, is 120cm wide and was partially obstructed by parked cars as shown in photographs 3 and 4.
- After approximately 15m the path has a short slight ramp, shown in photograph 6.
- Turn left at the end of the ramp between the Sports Centre and Sports Hall.
- The path here has an even and tarmac surface with a slight downhill slope and has handrails on both.
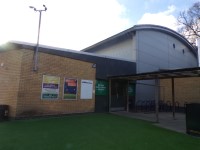
- The Sports Centre entrance is located on the right.


