
Access Guide
Summary
-
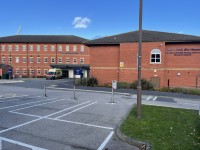
Building
View
- Services / Facilities within the building include; teaching laboratories, mock wards and a mock operating theatre, IT laboratories, seminar rooms, Resuscitation Quality Improvement (RQI) stations and Objective Structured Clinical Examination (OSCE) pods.
- Priestman Building to Helen McArdle House link (new tab) - click here.
-
Location of Toilet/Changing Facilities
View
- Accessible toilet facilities are located via the main entrance on the ground floor, through two sets of automatic doors and one set of double manual doors, then ahead.
On the first floor right after exiting the lift.
On the second floor right after exiting the lift. - Female standard toilet facilities are located via the main entrance on the ground floor, through two sets of automatic doors and one set of double manual doors, then ahead.
On the first floor right after exiting the lift.
On the second floor right after exiting the lift. - Male standard toilet facilities are located via the main entrance on the ground floor, through two sets of automatic doors and one set of double manual doors, then ahead.
On the first floor right after exiting the lift.
On the second floor right after exiting the lift. - Gender neutral toilet facilities are located via the main entrance on the ground floor, through two sets of automatic doors and one set of double manual doors, then ahead.
On the first floor right after exiting the lift.
On the second floor after right after exiting the lift.
- Accessible toilet facilities are located via the main entrance on the ground floor, through two sets of automatic doors and one set of double manual doors, then ahead.
- COVID-19 Information View
Rooms and Spaces Links
-
Lab(s)
View
- To view the AccessAble Access Guide for 101 Psychology Research Space please click here (new tab).
- To view the AccessAble Access Guide for 101A please click here (new tab).
- To view the AccessAble Access Guide for 101B please click here (new tab).
- To view the AccessAble Access Guide for 101C please click here (new tab).
- To view the AccessAble Access Guide for 101D please click here (new tab).
- To view the AccessAble Access Guide for 101E please click here (new tab).
- To view the AccessAble Access Guide for 101G please click here (new tab).
- To view the AccessAble Access Guide for 101H please click here (new tab).
- To view the AccessAble Access Guide for 101I please click here (new tab).
- To view the AccessAble Access Guide for 101J please click here (new tab).
- To view the AccessAble Access Guide for 101K please click here (new tab).
- To view the AccessAble Access Guide for 102 Guest Reception please click here (new tab).
- To view the AccessAble Access Guide for 103 Problem-Based Learning please click here (new tab).
- To view the AccessAble Access Guide for 104 Antenatal Care please click here (new tab).
- To view the AccessAble Access Guide for 105 Maternity Ward and 105A Accessible Toilet and Shower please click here (new tab).
- To view the AccessAble Access Guide for 108 Birthing Pool please click here (new tab).
- To view the AccessAble Access Guide for 109 Home Birthing Suite please click here (new tab).
- To view the AccessAble Access Guide for 110 Postnatal Care please click here (new tab).
- To view the AccessAble Access Guide for 117 RQI Station 1 please click here (new tab).
- To view the AccessAble Access Guide for 118 RQ1 Station 2 please click here (new tab).
Rooms and Spaces Links
-
Teaching Room(s)
View
- To view the AccessAble Access Guide for 203 OSCE Suite please click here (new tab).
- To view the AccessAble Access Guide for 203A OSCE Cell 1 please click here (new tab).
- To view the AccessAble Access Guide for 203B OSCE Cell 2 please click here (new tab).
- To view the AccessAble Access Guide for 203C OSCE Cell 3 please click here (new tab).
- To view the AccessAble Access Guide for 203D OSCE Cell 4 please click here (new tab).
- To view the AccessAble Access Guide for 203E OSCE Cell 5 please click here (new tab).
- To view the AccessAble Access Guide for 203F OSCE Cell 6 please click here (new tab).
- To view the AccessAble Access Guide for 203G OSCE Cell 7 please click here (new tab).
- To view the AccessAble Access Guide for 203H OSCE Cell 8 please click here (new tab).
- To view the AccessAble Access Guide for 204 OSCE Suite please click here (new tab).
- To view the AccessAble Access Guide for 204A OSCE Cell 1 please click here (new tab).
- To view the AccessAble Access Guide for 204B OSCE Cell 2 please click here (new tab).
- To view the AccessAble Access Guide for 204C OSCE Cell 3 please click here (new tab).
- To view the AccessAble Access Guide for 204D OSCE Cell 4 please click here (new tab).
- To view the AccessAble Access Guide for 204E OSCE Cell 5 please click here (new tab).
- To view the AccessAble Access Guide for 204F OSCE Cell 6 please click here (new tab).
- To view the AccessAble Access Guide for 204G OSCE Cell 7 please click here (new tab).
- To view the AccessAble Access Guide for 204H OSCE Cell 8 please click here (new tab).
- To view the AccessAble Access Guide for 217 Patient Diagnostic Suite please click here (new tab).
-
Seminar Room(s)
View
- To view the AccessAble Access Guide for 217A - Consultation Room please click here (new tab).
- To view the AccessAble Access Guide for 217B Consultation Room please click here (new tab).
- To view the AccessAble Access Guide for 218 Seminar Room please click here (new tab).
- To view the AccessAble Access Guide for 219 IT/Seminar Room please click here (new tab).
- To view the AccessAble Access Guide for 222 IT/Seminar Room please click here (new tab).
- To view the AccessAble Access Guide for 223 IT/Seminar Room please click here (new tab).
-
Lab(s)
View
- To view the AccessAble Access Guide for 120 Ward please click here (new tab).
- To view the AccessAble Access Guide for 120E Treatment Room please click here (new tab).
- To view the AccessAble Access Guide for 122 Ward please click here (new tab).
- To view the AccessAble Access Guide for 123 Resuscitation and Operation Theatre please click here (new tab).
- To view the AccessAble Access Guide for 123A Isolation Room please click here (new tab).
Rooms and Spaces Links
- Teaching Room(s) View
-
Seminar Room(s)
View
- To view the AccessAble Access Guide for 308A Study Cell please click here (new tab).
- To view the AccessAble Access Guide for 308B Study Cell please click here (new tab).
- To view the AccessAble Access Guide for 308C Study Cell please click here (new tab).
- To view the AccessAble Access Guide for 308D Study Cell please click here (new tab).
-
Lab(s)
View
- To view the AccessAble Access Guide for 310 Mock Ward please click here (new tab).
- To view the AccessAble Access Guide for 311 Mock Bedroom 1 and 311A Mock Ensuite Accessible Toilet please click here (new tab).
- To view the AccessAble Access Guide for 312 Treatment Bed please click here (new tab).
- To view the AccessAble Access Guide for 313 Seclusion Room please click here (new tab).
- To view the AccessAble Access Guide for 314 Therapeutic Reflection Room please click here (new tab).
- To view the AccessAble Access Guide for 317 Mock Accessible Toilet and Accessible Shower please click here (new tab).
- To view the AccessAble Access Guide for 318 Sluice please click here (new tab).
- To view the AccessAble Access Guide for 319 Bedroom 2 please click here (new tab).
- To view the AccessAble Access Guide for 320 Day Room please click here (new tab).
- To view the AccessAble Access Guide for 321 Bedroom 3 please click here (new tab).
- To view the AccessAble Access Guide for 322 Bedroom 4 and 322A Ensuite Accessible Toilet and Shower please click here (new tab).
- To view the AccessAble Access Guide for 325 Multi Sensory Environment please click here (new tab).
- To view the AccessAble Access Guide for 328 Behaviour Observation Suite please click here (new tab).
- To view the AccessAble Access Guide for 330 Monitoring Station please click here (new tab).
Getting Here (City Campus)
-
By Road
View
- The City Campus is located to the west of Sunderland city centre and can be accessed from the A183 Chester Road from the west, the A1231 St Michael's Way from the south and east and the A1232 Silksworth Row or A183 Lancaster Road from the north.
- There is limited pay and display parking across the campus on a first come first served basis.
If you’re a Blue Badge holder, you can register your vehicle for University Blue Badge parking. This enables you to park for free, in designated disabled parking bays on campus.
Due to the location of the campuses and the large number of students and staff you are not guaranteed a parking space.
The University operates a cashless parking system. Students and staff may be eligible to register their vehicle with the University which reduces the cost of parking on campus.
Visitors attending conferences, training or other events at the University should seek advice on parking from the relevant Faculty/Service they are meeting. - For more information on parking at the University of Sunderland please click here (opens new tab).
-
By Bus
View
- There is a bus stop within 150 metres of the campus.
- There are bus stops on Chester Road that are served by the following Go North East bus services:
2 Berries, 2A Berries, 35 Cherry, 35A Cherry, 39 Graphite (eastbound), 39A Graphite, 78 Country Ranger, 135 (eastbound), 136 (westbound), 701 Sunderland Comet, 702 Sunderland Comet, and route 935.
There are additional services at the same stops operated by Stagecoach:
8, 8A, 16 (westbound), X24 and X24A. There are additional bus stops to the north of the campus on Silksworth Row and St Michaels Way. - For more information on Go North East bus services in the Sunderland area please click here (opens new tab).
-
By Train
View
- The nearest Railway Station is Sunderland.
- Sunderland Railway Station is located 750m (0.5 miles) east of the City Campus, with links to the campus by Metro or by bus.
Sunderland is a Category A station with lifts to all platforms from the North end of the station.
The booking office does not have a height adjusted counter but staff are happy to come out to assist.
Accessible ticket machines are available.
A ramp is available for boarding and alighting trains. - For more information on Sunderland railway station please click here (opens new tab).
- For more information on national and local train services at Sunderland please click here (opens new tab).
-
By Metro
View
- The nearest Metro station is University.
- The University stop is located at the south end of the City Campus off the A183 Chester Road.
The station is step free with ramped access to both platforms.
Ticket vending machines and Help Points are located at the rear of each ticketing area.
This station is unstaffed and there are no toilet facilities. - For more information please click here (opens new tab).
Useful Information
- The Disability Support Team (DST) provide information, support and guidance to students with disabilities, mental health difficulties, Specific Learning Difficulties (such as dyslexia) and long-term medical conditions.
Our area of expertise is learning support; if you feel that your condition or impairment is having an impact upon your studies, you can contact us.
We are the starting point for you to discuss and organise your learning support.
We are a confidential and individual service.
Disability Support Advisers are available to meet students on a one-to-one basis to discuss their particular needs and help them put support arrangements in place. - To see more information on Disability Support Team please click here (opens new tab).
- Telephone Number: 0191 515 2952.
- Email: [email protected].
- Anyone can experience thoughts and feelings that are distressing or affect their ability to concentrate on their work or studies.
Looking after your physical health is fundamental to student success.
We are here to support you, and your Wellbeing Team provides a range of support in relation to all your health needs.
It is very important to ensure you can access the support you need when you need it.
We work alongside the Disability Support Team for all students with a diagnosed condition.
The Disability Support Team (DST) provides information, support, and guidance to students with disabilities, mental health difficulties.
Specific Learning Difficulties (such as dyslexia), and long-term medical conditions. - To see more information on Wellbeing please click here (opens new tab).
- Telephone Number: 0191 515 2933.
- Email: [email protected].
- We offer a great choice of accommodation for you to choose from and our rent prices include heating, lighting, water, fuel, Wi-Fi and personal possessions insurance.
All of our residences are in a great location for students studying at either City Campus or Sir Tom Cowie Campus at St Peter's.
They are all within walking distance of Sunderland City Centre with access to supermarkets, bars/restaurants, theatres/cinema and transport links. - To see more information on Accommodation please click here (opens new tab).
- Telephone Number: 0191 515 2943.
- Email: [email protected].
- The Gateway is your one-stop shop for all your enquiries.
No matter what your question is, we’ll be able to help resolve your issue or at least advise on what you need to do next and we'll keep you informed along the way through our enquiry system, Compass.
Alongside our extensive online support via Compass and our Self Service on e:Vision, you will also be able to find support at both our City and Sir Tom Cowie Campus at St Peter's.
We have an Enquiry Desk at each campus ready to help you when you need it:
City Campus - Gateway Building
Sir Tom Cowie Campus at St Peter's - Prospect Building. - To see more information on Gateway Enquiries please click here (opens new tab).
- Telephone Number: 0191 515 2222.
- Email: [email protected].
- Library Services deliver a range of services, spaces, and support across the learning community.
In collaboration with the community, they support learners' engagement with their studies and underpin the University's academic, research, and graduate success.
The services are personalised and accessible, and blend digital and print, providing customised resources.
These collections support teaching, learning, and research both on-and off- campus.
The library flexible learning spaces offer varied environments appropriate to changing student and staff needs.
The library staff skills support enables learners to get the very best from library collections and develop lifelong learning and career skills. - To see more information on Library Services please click here (opens new tab).
- Telephone Number: 0191 515 3691.
- Email: [email protected].
Building Parking
- The building does not have its own dedicated parking.
-
Site/Campus Car Parks
View
- There is a site/campus car park for staff, students and visitors within approximately 200m.
- The name of the car park is Helen McArdle House Car Park.
- The car park is located in front of Helen McArdle House.
-
Public Car Parks
View
- There is a car park for public use within 200m (approx).
- The name of the car park is Johnson Street Pay and Display Car Park.
- The car park is located off Johnson Street, adjacent to Helen McArdle House.
-
On Street Parking
View
- Clearly signed and/or standard marked parking bays are available.
- The on street standard parking bay(s) is/are located on Johnson Street.
-
Drop Off Point
View
- There is not a designated drop off point.
Site/Campus Car Park (Helen McArdle House)
-
Car Park
View
- The car park is located to the front of the main entrance of Helen McArdle House.
- The car park type is open air/surface.
- The car park does not have a height restriction barrier.
- The car park surface is tarmac.
- Designated Blue Badge parking bays are available.
- The Blue Badge bay(s) is/are clearly marked.
- There is/are 4 designated Blue Badge parking bay(s) within this car park.
- The dimensions of the designated parking bay(s) are 244cm x 470cm.
- The Blue Badge parking bays have a marked zone to one side and the rear.
- The marked zone is 114cm wide.
- The dimensions of the designated bays do vary in size.
-
Charges and Restrictions
View
- This car park can be used by staff, students, visitors and Blue Badge holders.
- Parking charges apply for all except Blue Badge holders.
- Signs are provided to give information on parking charges/restrictions.
- Signs are clearly presented.
-
Drop Off Point
View
- There is not a designated drop off point in this car park.
-
Car Park Access
View
- There is step free access from this car park.
- Buildings are not clearly signposted from this car park.
- There is not a campus map available within the car park.
- The nearest designated bay is 35m (38yd 10in) from the main entrance.
- Blue Badge holders can register their vehicle for University Blue Badge free parking in designated disabled parking bays on campus via the link below.
Parking at both campuses is first come, first served.
You are not guaranteed a parking space.
Staff and students who do not live at university accommodation may register their vehicle with the university which reduces the cost of parking on campus.
The university operates a cashless parking system that allows payment by the following methods:
• Via the JustPark app, available from Google Play or iTunes, if you have a smartphone, including paying in advance.
• By following the directions on car parking signs if you do not have a smartphone.
• By using the two cashless parking terminals at the northern entrance to Gateway building on City Campus or the southern entrance to the Reg Vardy Centre on Sir Tom Cowie Campus at St Peter's.
Students in University accommodation must register their vehicle, entitling them to free parking at their accommodation site.
However, they are not permitted to park on teaching campuses between 8am – 5pm on weekdays and are encouraged to use the University’s free campus bus and Connect service. Where requested, the University website link is as follows. https://www.sunderland.ac.uk/help/contact-us/parking/.
-
Comments
View
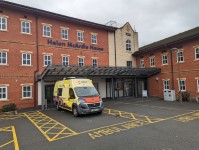
- There are two additional two blue badge bays right outside of the building to the right of the Patient Transfer Suite entrance (see pictures 7 and 8).
- This car park is not for the public.
- If the vehicle is not registered with the estate's office, visitors will pay a higher parking fee per hour.
Outside Access (Main Entrance)
-
Entrance
View
- This information is for the entrance located at front of the Helen McArdle Building.
- This entrance gives access to the ground floor of the Helen McArdle Building.
- The entrance area/door is clearly signed.
- This entrance is signed with 'Main Entrance'.
- There is step-free access at this entrance.
- There is a canopy or recess which provides weather protection at this entrance.
- There is a dark mat or floor marking at this entrance that might be perceived as a hole.
- The entrance door(s) does not/do not contrast visually with its immediate surroundings.
- There is not a bell/buzzer.
- There is not an intercom.
- The main door(s) open(s) automatically.
- The door(s) is/are double width.
- The width of the door opening is 130cm.
- There is a second set of doors.
- The door(s) open(s) automatically.
- The door(s) is/are double width.
- The width of the door opening is 130cm.
- There is key card access at the second automatic door The height of the key card reader is 104cm.
Entrance (Lift Lobby)
-
Entrance
View
- This information is for the entrance located directly ahead from the second set of automatic doors.
- This entrance gives access to the lift lobby.
- The entrance area/door is not clearly signed.
- There is step-free access at this entrance.
- The entrance door(s) does/do contrast visually with its immediate surroundings.
- There is not a bell/buzzer.
- There is not an intercom.
- The main door(s) open(s) towards you (pull).
- The door(s) is/are double width.
- The door(s) is/are heavy.
- The width of the door opening is 130cm.
Outside Access (Patient Transfer Entrance)
-
Entrance
View
- This information is for the entrance located adjacent to the main entrance.
- This entrance gives access to Ward 120, Ward 122, Resuscitation and Operating Theatre, RQI Stations 1 and 2.
- The entrance area/door is clearly signed.
- This entrance is signed with 'Patient Transfer Suite'.
- There is step-free access at this entrance.
- There is a canopy or recess which provides weather protection at this entrance.
- There is a dark mat or floor marking at this entrance that might be perceived as a hole.
- The entrance door(s) does/do contrast visually with its immediate surroundings.
- There is not a bell/buzzer.
- There is not an intercom.
- A key card is required for access at this entrance.
- The height of the key card reader is 104cm.
- The main door(s) open(s) automatically.
- The door(s) is/are double width.
- The width of the door opening is 130cm.
- There is a second set of doors.
- The door(s) open(s) automatically.
- The door(s) is/are double width.
- The width of the door opening is 133cm.
Reception (Patient Transfer Suite)
-
Reception
View
- The reception point is located in the foyer ahead and to the right from the Patient Transfer Suite entrance.
- The reception point is approximately 8m (8yd 2ft) from the Patient Transfer Suite entrance.
- The reception area/desk is clearly visible from the entrance.
- There is step-free access to the reception point.
- There is a clear unobstructed route to the reception point.
- There are windows, TVs, glazed screens or mirrors at/behind the reception point which could adversely affect the ability of someone to lip read.
- The reception counter is not placed in front of a background which is patterned.
- The lighting levels at the reception point are good.
- The height of the reception counter is 72cm.
- There is sufficient space to write or sign documents on the counter.
- There is a lowered section of the counter.
- The height of the lowered section at the counter is 68cm.
- There is sufficient space to write or sign documents on the lowered section of the counter.
- There is a clear knee recess beneath the counter.
- The counter is not staffed.
- There is not a bell to attract attention.
- There is not a hearing assistance system at the reception point.
- There is no wayfinding signage available at/close to the reception.
- The type of flooring in the reception area is vinyl.
-
Reception Waiting Area
View
- There is not a waiting area close to the reception point.
-
Security Barriers
View
- This is a mock reception desk in the Patient Transfer Suite.
Getting Around
-
Access
View
- There is step-free access throughout the building via lift(s).
-
Circulation
View
- There are doors in corridors/walkways which have to be opened manually.
- The type of flooring in corridors/walkways is carpet.
- There is high colour contrast between the walls and floor in all areas.
- There is a mixture of seating with and without armrests at regular intervals.
- The lighting levels are good.
-
Signage
View
- Wayfinding signage is provided.
- Floor plans/maps are available.
- The colour, design and typeface of signs is consistent throughout the building.
-
Safe Place(s)
View
- There is not a designated place of safety which can be used by people with dementia, autism or learning disabilities.
-
Audio
View
- This venue does not play background music in communal areas.
- There is not a hearing assistance system in the communal areas of the building.
Other Floors
-
Stairs
View
- Stairs can be used to access other floors.
- The stairs are located on level 1, to the left on entering the building.
- The stairs are approximately 6m from the from the main entrance.
- The stairs are clearly visible from the entrance.
- The floors which are accessible by stairs are G, 1, 2, and 3.
- There are 10 steps between floors.
- The height of the step(s) is/are between the recommended 15cm and 18cm.
- The height of the step(s) is/are 16cm.
- The depth of the step(s) is/are between the recommended 30cm and 45cm.
- The steps are clearly marked.
- There is a/are handrail(s) at the step(s).
- The steps have a handrail on both sides.
- Handrails are at the recommended height (90cm-100cm).
- Handrails do cover the flight of stairs throughout its length.
- Handrails are easy to grip.
- Handrails do not extend horizontally beyond the first and last steps.
- There is a landing.
- The lighting levels at the steps are moderate to good.
Lift
- The lift is located via the main entrance, on the ground floor, to the left after going through the third set of doors on entering.
- Signs indicating the location of the lift are not available from the entrance.
- The lift is approximately 10m (10yd 2ft) from the main entrance.
- The lift is a standard lift.
- A member of staff does not need to be notified for use of the lift.
- The floors which are accessible by this lift are G, 1, 2 and 3.
- The weight limit for the lift is 1600kg 21 persons.
- Clear signs indicating the facilities on each floor are provided on lift lobby landings.
- There is a clear level manoeuvring space of 150cm × 150cm in front of the lift.
- Lift doors do contrast visually with lift lobby walls.
- The external controls for the lift are within 90cm - 110cm from the floor.
- The colour contrast between the external lift controls and the control plate is high.
- The colour contrast between the external lift control plate and the wall is high.
- The clear door width is 136cm (4ft 6in).
- The dimensions of the lift are 136cm x 244cm (4ft 6in x 8ft).
- There are not separate entry and exit doors in the lift.
- There is a mirror to aid reversing out of the lift.
- There is not a list of floor services available within the lift.
- The lift does have a visual floor indicator.
- The lift does have an audible announcer.
- The internal controls for the lift are within 90cm - 120cm from the floor.
- There is not a hearing loop system.
- The lift does have Braille markings.
- The lift does have tactile markings.
- The lighting levels in the lift are good.
Accessible Toilet(s) (Level 1 - Left Hand Transfer)
- There is an/are accessible toilet(s) available.
-
Location and Access
View
- This accessible toilet is located on level 1, ahead from main entrance.
- This accessible toilet is approximately 11m (12yd 1in) from the the main entrance.
- There is step-free access into the accessible toilet.
- This is a gender neutral toilet.
- A key is not required for the accessible toilet.
- There is pictorial and written text signage on or near the toilet door.
- The contrast between the external door and wall is good.
- The door opens outwards.
- The door is light.
- The door is locked by a lever twist.
- The width of the accessible toilet opening is 87cm (2ft 10in).
- The contrast between the internal door and wall is good.
- The door has a horizontal grab rail.
- The contrast between the horizontal grab rail and internal door is good.
-
Toilet Features
View
- The dimensions of the accessible toilet are 203cm x 149cm (6ft 8in x 4ft 11in).
- The accessible toilet does not have an unobstructed minimum turning space of 150cm x 150cm.
- The lighting levels are good.
- There is a lateral transfer space.
- As you face the toilet pan the transfer space is on the left.
- The lateral transfer space is 134cm (4ft 5in).
- The transfer space is obstructed by a female sanitary bin.
- There is a flush on the transfer side.
- There is a spatula type lever flush.
- There is a dropdown rail on the transfer side.
- The contrast between the dropdown rail(s) and wall is good.
- There is a/are wall-mounted grab rail(s) available.
- As you face the toilet the wall-mounted grab rail(s) is/are on both sides.
- There is a vertical wall-mounted grab rail on the transfer side.
- There is a horizontal wall-mounted grab rail on the opposite side of the seat to the transfer space.
- The contrast between the wall-mounted grab rail(s) and wall is good.
- The contrast between the walls and floor is good.
- There is an emergency alarm.
- The emergency pull cord alarm is fully functional.
- There is a red flashing fire alarm beacon within the toilet.
- Disposal facilities are available in the toilet.
- There is a/are female sanitary disposal units.
- There is not a/are not coat hook(s).
-
Additional Fixtures
View
- There is a mirror.
- The mirror is placed at a lower level or at an angle for ease of use.
- There is not a shelf within the accessible toilet.
- The toilet has a cistern.
- The height of the toilet seat above floor level is 48cm (1ft 7in).
- The toilet seat colour contrast is good.
- There is a toilet roll holder.
- The toilet roll holder can be reached from seated on the toilet.
- The toilet roll holder is not placed higher than 100cm (3ft 3in).
- The height of the toilet roll holder is 107cm (3ft 6in).
- The contrast between the toilet roll holder and the wall is fair.
- There is a wash basin.
- The wash basin and tap(s) can be reached from seated on the toilet.
- The wash basin is not placed higher than 74cm (2ft 5in).
- The height of the wash basin is 72cm (2ft 4in).
- There are vertical wall-mounted grab rails on both sides of the wash basin.
- The contrast between the wash basin wall-mounted grab rail(s) and wall is good.
- The wash basin tap type is lever mixer.
- There is a wall fixed soap dispenser.
- The soap dispenser can be reached from seated on the toilet.
- The height of the soap dispenser is 109cm.
- There is not a towel dispenser.
- There is a hand dryer.
- The hand dryer is not placed higher than 100cm (3ft 3in).
- The height of the hand dryer is 100cm (3ft 3in).
- The contrast between the hand dryer and the wall is poor.
Accessible Toilet(s) (Level 2 - Left Hand Transfer)
- There is an/are accessible toilet(s) available.
-
Location and Access
View
- This accessible toilet is located via the lift on level 2, right on exiting the lift.
- This accessible toilet is approximately 5m (5yd 1ft) from the the building lift.
- There is step-free access into the accessible toilet, via lift.
- This is a gender neutral toilet.
- A key is not required for the accessible toilet.
- There is pictorial and written text signage on or near the toilet door.
- The contrast between the external door and wall is good.
- The door opens outwards.
- The door is light.
- The door is locked by a lever twist.
- The width of the accessible toilet opening is 87cm (2ft 10in).
- The contrast between the internal door and wall is good.
- The door has a horizontal grab rail.
- The contrast between the horizontal grab rail and internal door is good.
-
Toilet Features
View
- The dimensions of the accessible toilet are 196cm x 153cm (6ft 5in x 5ft).
- The accessible toilet does not have an unobstructed minimum turning space of 150cm x 150cm.
- The lighting levels are good.
- There is a lateral transfer space.
- As you face the toilet pan the transfer space is on the left.
- The lateral transfer space is 132cm (4ft 4in).
- The transfer space is obstructed by a female sanitary bin.
- There is a flush on the transfer side.
- There is a spatula type lever flush.
- There is a dropdown rail on the transfer side.
- The contrast between the dropdown rail(s) and wall is good.
- There is a/are wall-mounted grab rail(s) available.
- As you face the toilet the wall-mounted grab rail(s) is/are on both sides.
- There is a vertical wall-mounted grab rail on the transfer side.
- There is a horizontal wall-mounted grab rail on the opposite side of the seat to the transfer space.
- The contrast between the wall-mounted grab rail(s) and wall is good.
- The contrast between the walls and floor is good.
- There is an emergency alarm.
- The emergency pull cord alarm is fully functional.
- There is a red flashing fire alarm beacon within the toilet.
- Disposal facilities are available in the toilet.
- There is a/are female sanitary disposal units.
- There is not a/are not coat hook(s).
-
Additional Fixtures
View
- There is a mirror.
- The mirror is placed at a lower level or at an angle for ease of use.
- There is not a shelf within the accessible toilet.
- The toilet has a cistern.
- The height of the toilet seat above floor level is 47cm (1ft 7in).
- The toilet seat colour contrast is good.
- There is a toilet roll holder.
- The toilet roll holder can be reached from seated on the toilet.
- The toilet roll holder is placed higher than 100cm (3ft 3in).
- The height of the toilet roll holder is 107cm (3ft 6in).
- The contrast between the toilet roll holder and the wall is fair.
- There is a wash basin.
- The wash basin and tap(s) can be reached from seated on the toilet.
- The wash basin is not placed higher than 74cm (2ft 5in).
- The height of the wash basin is 72cm (2ft 4in).
- There are vertical wall-mounted grab rails on both sides of the wash basin.
- The contrast between the wash basin wall-mounted grab rail(s) and wall is good.
- The wash basin tap type is lever mixer.
- There is a wall fixed soap dispenser.
- The soap dispenser can be reached from seated on the toilet.
- The height of the soap dispenser is 109cm.
- There is not a towel dispenser.
- There is a hand dryer.
- The hand dryer is not placed higher than 100cm (3ft 3in).
- The height of the hand dryer is 100cm (3ft 3in).
- The contrast between the hand dryer and the wall is poor.
Accessible Toilet(s) (Level 3 - Left Hand Transfer)
- There is an/are accessible toilet(s) available.
-
Location and Access
View
- This accessible toilet is located on level 3, to the right on exiting the lift.
- This accessible toilet is approximately 4m (4yd 1ft) from the the building lift.
- There is step-free access into the accessible toilet, via lift.
- This is a gender neutral toilet.
- A key is not required for the accessible toilet.
- There is pictorial and written text signage on or near the toilet door.
- The contrast between the external door and wall is good.
- The door opens outwards.
- The door is light.
- The door is locked by a lever twist.
- The width of the accessible toilet opening is 87cm (2ft 10in).
- The contrast between the internal door and wall is good.
- The door has a horizontal grab rail.
- The contrast between the horizontal grab rail and internal door is good.
-
Toilet Features
View
- The dimensions of the accessible toilet are 149cm x 296cm (4ft 11in x 9ft 9in).
- The accessible toilet does not have an unobstructed minimum turning space of 150cm x 150cm.
- The lighting levels are good.
- There is a lateral transfer space.
- As you face the toilet pan the transfer space is on the left.
- The lateral transfer space is 76cm (2ft 6in).
- The transfer space is obstructed by a female sanitary bin.
- There is a flush on the transfer side.
- There is a spatula type lever flush.
- There is a dropdown rail on the transfer side.
- The contrast between the dropdown rail(s) and wall is good.
- There is a/are wall-mounted grab rail(s) available.
- As you face the toilet the wall-mounted grab rail(s) is/are on both sides.
- There is a vertical wall-mounted grab rail on the transfer side.
- There is a horizontal wall-mounted grab rail on the opposite side of the seat to the transfer space.
- The contrast between the wall-mounted grab rail(s) and wall is good.
- The contrast between the walls and floor is good.
- There is an emergency alarm.
- The emergency pull cord alarm is fully functional.
- There is a red flashing fire alarm beacon within the toilet.
- Disposal facilities are available in the toilet.
- There is a/are female sanitary disposal units.
- There is not a/are not coat hook(s).
-
Additional Fixtures
View
- There is a mirror.
- The mirror is not placed at a lower level or at an angle for ease of use.
- There is not a shelf within the accessible toilet.
- The toilet has a cistern.
- The height of the toilet seat above floor level is 47cm (1ft 7in).
- The toilet seat colour contrast is good.
- There is a toilet roll holder.
- The toilet roll holder can be reached from seated on the toilet.
- The toilet roll holder is placed higher than 100cm (3ft 3in).
- The height of the toilet roll holder is 104cm (3ft 5in).
- The contrast between the toilet roll holder and the wall is fair.
- There is a wash basin.
- The wash basin and tap(s) can be reached from seated on the toilet.
- The wash basin is placed higher than 74cm (2ft 5in).
- The height of the wash basin is 76cm (2ft 6in).
- There are vertical wall-mounted grab rails on both sides of the wash basin.
- The contrast between the wash basin wall-mounted grab rail(s) and wall is good.
- The wash basin tap type is lever mixer.
- There is a wall fixed soap dispenser.
- The soap dispenser can be reached from seated on the toilet.
- The height of the soap dispenser is 96cm.
- There is not a towel dispenser.
- There is a hand dryer.
- The hand dryer is placed higher than 100cm (3ft 3in).
- The height of the hand dryer is 102cm (3ft 4in).
- The contrast between the hand dryer and the wall is poor.
Standard Toilet(s)
- Standard toilet facilities are available.
-
Toilet Facilities
View
- The female and male toilets are located opposite the main entrance doors.
- There is step-free access into the toilet(s).
- The standard toilet(s) is/are approximately 8m from the main entrance.
- The colour contrast between the external toilet door(s) and wall(s) is good.
- There is pictorial signage on or near the toilet door.
- An ambulant toilet cubicle is available.
- There are horizontal wall mounted rails available on both sides of the toilet.
- The placement of vertical wall mounted grab rails vary between the ambulant cubicles.
- The height of the wash basin(s) is 75cm.
- The wash basin(s) tap type is lever mixer.
- Lighting levels are good.
- There are similar toilets on level 2 and 3.