Access Guide
Introduction
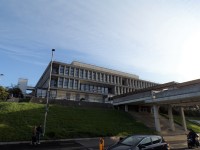
- The University Library is approximately 1.2 miles from the Campus East Interchange.
There are slight and steep slopes between the Campus East Interchange.
Most of the surfaces along the route are either tarmac or block paved.
. - LMO, LFA, LBK & LBU - University Library and Borthwick Institute for Archives link (new tab) - click here.
East Campus Interchange
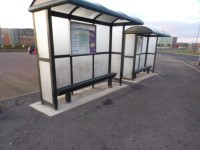
- The East Interchange stop has sheltered seating.
- There is an electronic display of the bus schedule here.
- There are slopes leading away from the interchange and towards the campus.
Campus East Interchange to Kimberlow Lane
- Head along the path with a slight gradient heading downhill to the west from the Interchange for approximately 75m (photograph 1).
- At the end of the path cross the road.
- The road has tactile dropped kerbs on either side (photographs 2 and 3).
- On the other side of the road head along the path ahead (photograph 4) for approximately 40m before reaching Kimberlow Rise.
- There are tactile dropped kerbs on either side of Kimberlow Rise (photograph 5).
- After crossing Kimberlow Rise, continue along the path in front of you until you reach the first path to your left after 55m (photograph 6).
- Take the first path to the left and head towards Kimberlow Lane for approximately 12m (photograph 7).
Crossing Kimberlow Lane
- Kimberlow Lane crossing has tactile dropped kerbs on either side of the road.
- There is a central island that also has tactile dropped kerbs either side.
- After crossing the Kimberlow Lane, turn right and head along the pedestrian footpath to the right.
- There are separate pedestrian and cyclist footpaths located here which, after 25m, combine.
- Along the path before they combine is a section of tactile block paving.
Field Lane to Lakeside Way
- Head along the path in front of you and continue for approximately 750m to reach Lakeside Way.
- This path also serves as a cycle path.
- The surface of the path is tarmac.
- There are sections of tactile paving along the path.
- There are bus stops along the side of the road.
- After 750m there is a crossing over Lakeside Way.
Lakeside Way Crossing and Field Lane Crossing
- The Lakeside Way crossing (photograph 1) has a set of traffic lights with crossing controls at a height of 114cm.
- The crossing has dropped kerbs on either side.
- After crossing, turn right and continue along the path for approximately 35m (photograph 2) until reaching the Field Lane crossing (photographs 3 and 4).
- This crossing has traffic lights with controls at a height of 113cm and tactile dropped kerbs either side.
- After crossing, turn right and follow the path as it curves to the left and onto Church Lane (photograph 5).
- Head past a set of tactile paving for a crossing of Church Way (photograph 6).
Church Lane to Innovation Way
- Head along Church Lane for 325m onto Innovation Way.
- There is a slight uphill slope as you continue along the path.
- There are tactile dropped kerbs after approximately 60m for crossings across Church Lane (photograph 2). Continue ahead.
- After a few metres there is a section of tactile paving on an entrance way leading to Heslington Church (photograph 3).
- Continue along the path (photographs 4 and 5).
- As you proceed you will encounter service roads for Campus West Buildings, The York Plasma Institute, JWPCreers and Genesis 6.
- All service roads have tactile dropped kerbs on both sides (photograph 6, 7, 8 and 9).
- Continue until you reach Innovation Way.
- On approach, the surface of the pavement changes to brick block paving.
Innovation Way to Alcuin Way
- Head south along Innovation Way for 100m to the tactile dropped kerb crossing for Innovation Way.
- There is a slight downhill gradient.
- After approximately 60m, cross the service road.
- It has tactile dropped kerbs on either side (photograph 4).
- There is a brief section of pavement for approximately 15m (photograph 5) before a similar service road with tactile dropped kerbs on either side is reached (photographs 6 and 7).
- There is a section of pavement for approximately 25m (photograph 8) before the crossing across Innovation Way.
- The crossing has tactile dropped kerbs on either side of Innovation Way (photograph 9 and 10).
- Turn right after crossing Innovation Way.
- After a few metres there is another service road with tactile paving on either side (photographs 11 and 12).
- After crossing this service road, continue for approximately 60m to reach Alcuin Way (photographs 13 and 14).
Alcuin Way to the Morrell Way Bridge
- Continue along Alcuin Way for approximately 95m.
- There is a slight uphill gradient on the road.
- There is a level service road with tactile kerbs on either side (photographs 1 and 2).
- After crossing the service road continue uphill along the pavement (photographs 3, 4 and 5).
- There is another crossing with tactile dropped kerbs on either side (photographs 6 and 7).
- After crossing, turn left along the block paved path that heads around Alcuin College Block D (photographs 8 and 9).
- Continue along the path and head past Alcuin College Seebohm Rowntree Building, continuing down first a slight slope (photograph 10) and then a steep slope (photograph 11).
- Continue past the Alcuin College Seebohm Rowntree Building (photograph 12) before turning left and heading to the Morrell Way Bridge (photographs 13 to 16).
Morrell Way Bridge to University Library Main Entrance
- Cross the Morrell Way Bridge, which has slight slopes to access and exit on either side (photographs 1 and 2).
- After crossing the bridge turn left and follow the path around the University Library for approximately 40m until you reach the University Library Main Entrance (photographs 3, 4 5 and 6).
Outside Access (Main Entrance)
-
Entrance
View
- This information is for the entrance located at the front of the building.
- There is step free access at this entrance.
- There is not a bell/buzzer.
- There is not an intercom.
- There is a canopy or recess which provides weather protection at this entrance.
- The main door(s) open(s) automatically.
- The door(s) is / are double.
- The width of the door opening is 160cm (5ft 3in).
-
Second Set of Doors
View
- There is a second set of doors.
- The door(s) open(s) automatically.
- The door(s) is / are double.
- The width of the door opening is 124cm (4ft 1in).
-
Comments
View
- There is a third set of doors to access the library with a width of 128cm.
- There are alternate entrance doors that bypass the first set of entrance doors. These can be seen in photograph 4.


